Recently I opened for Wyoming artist Jalan Crosslands at a concert benefitting Rett Syndrome (a developmental disorder my daughter has). My setup is fairly compact but takes some time to get all of the cables hooked up and the sound rebalanced.
At home I keep my gear plugged into some studio monitors I have on my desk so I can practice and be confident that my practice sound is semi-consistent with show sound.
While helping Jalan unload and setup I realized that the majority of my gear would fit in a small road box. I started wondering if I could build a self-contained box where all of the gear could stay hooked up and just have a power cable in and a premixed signal out.
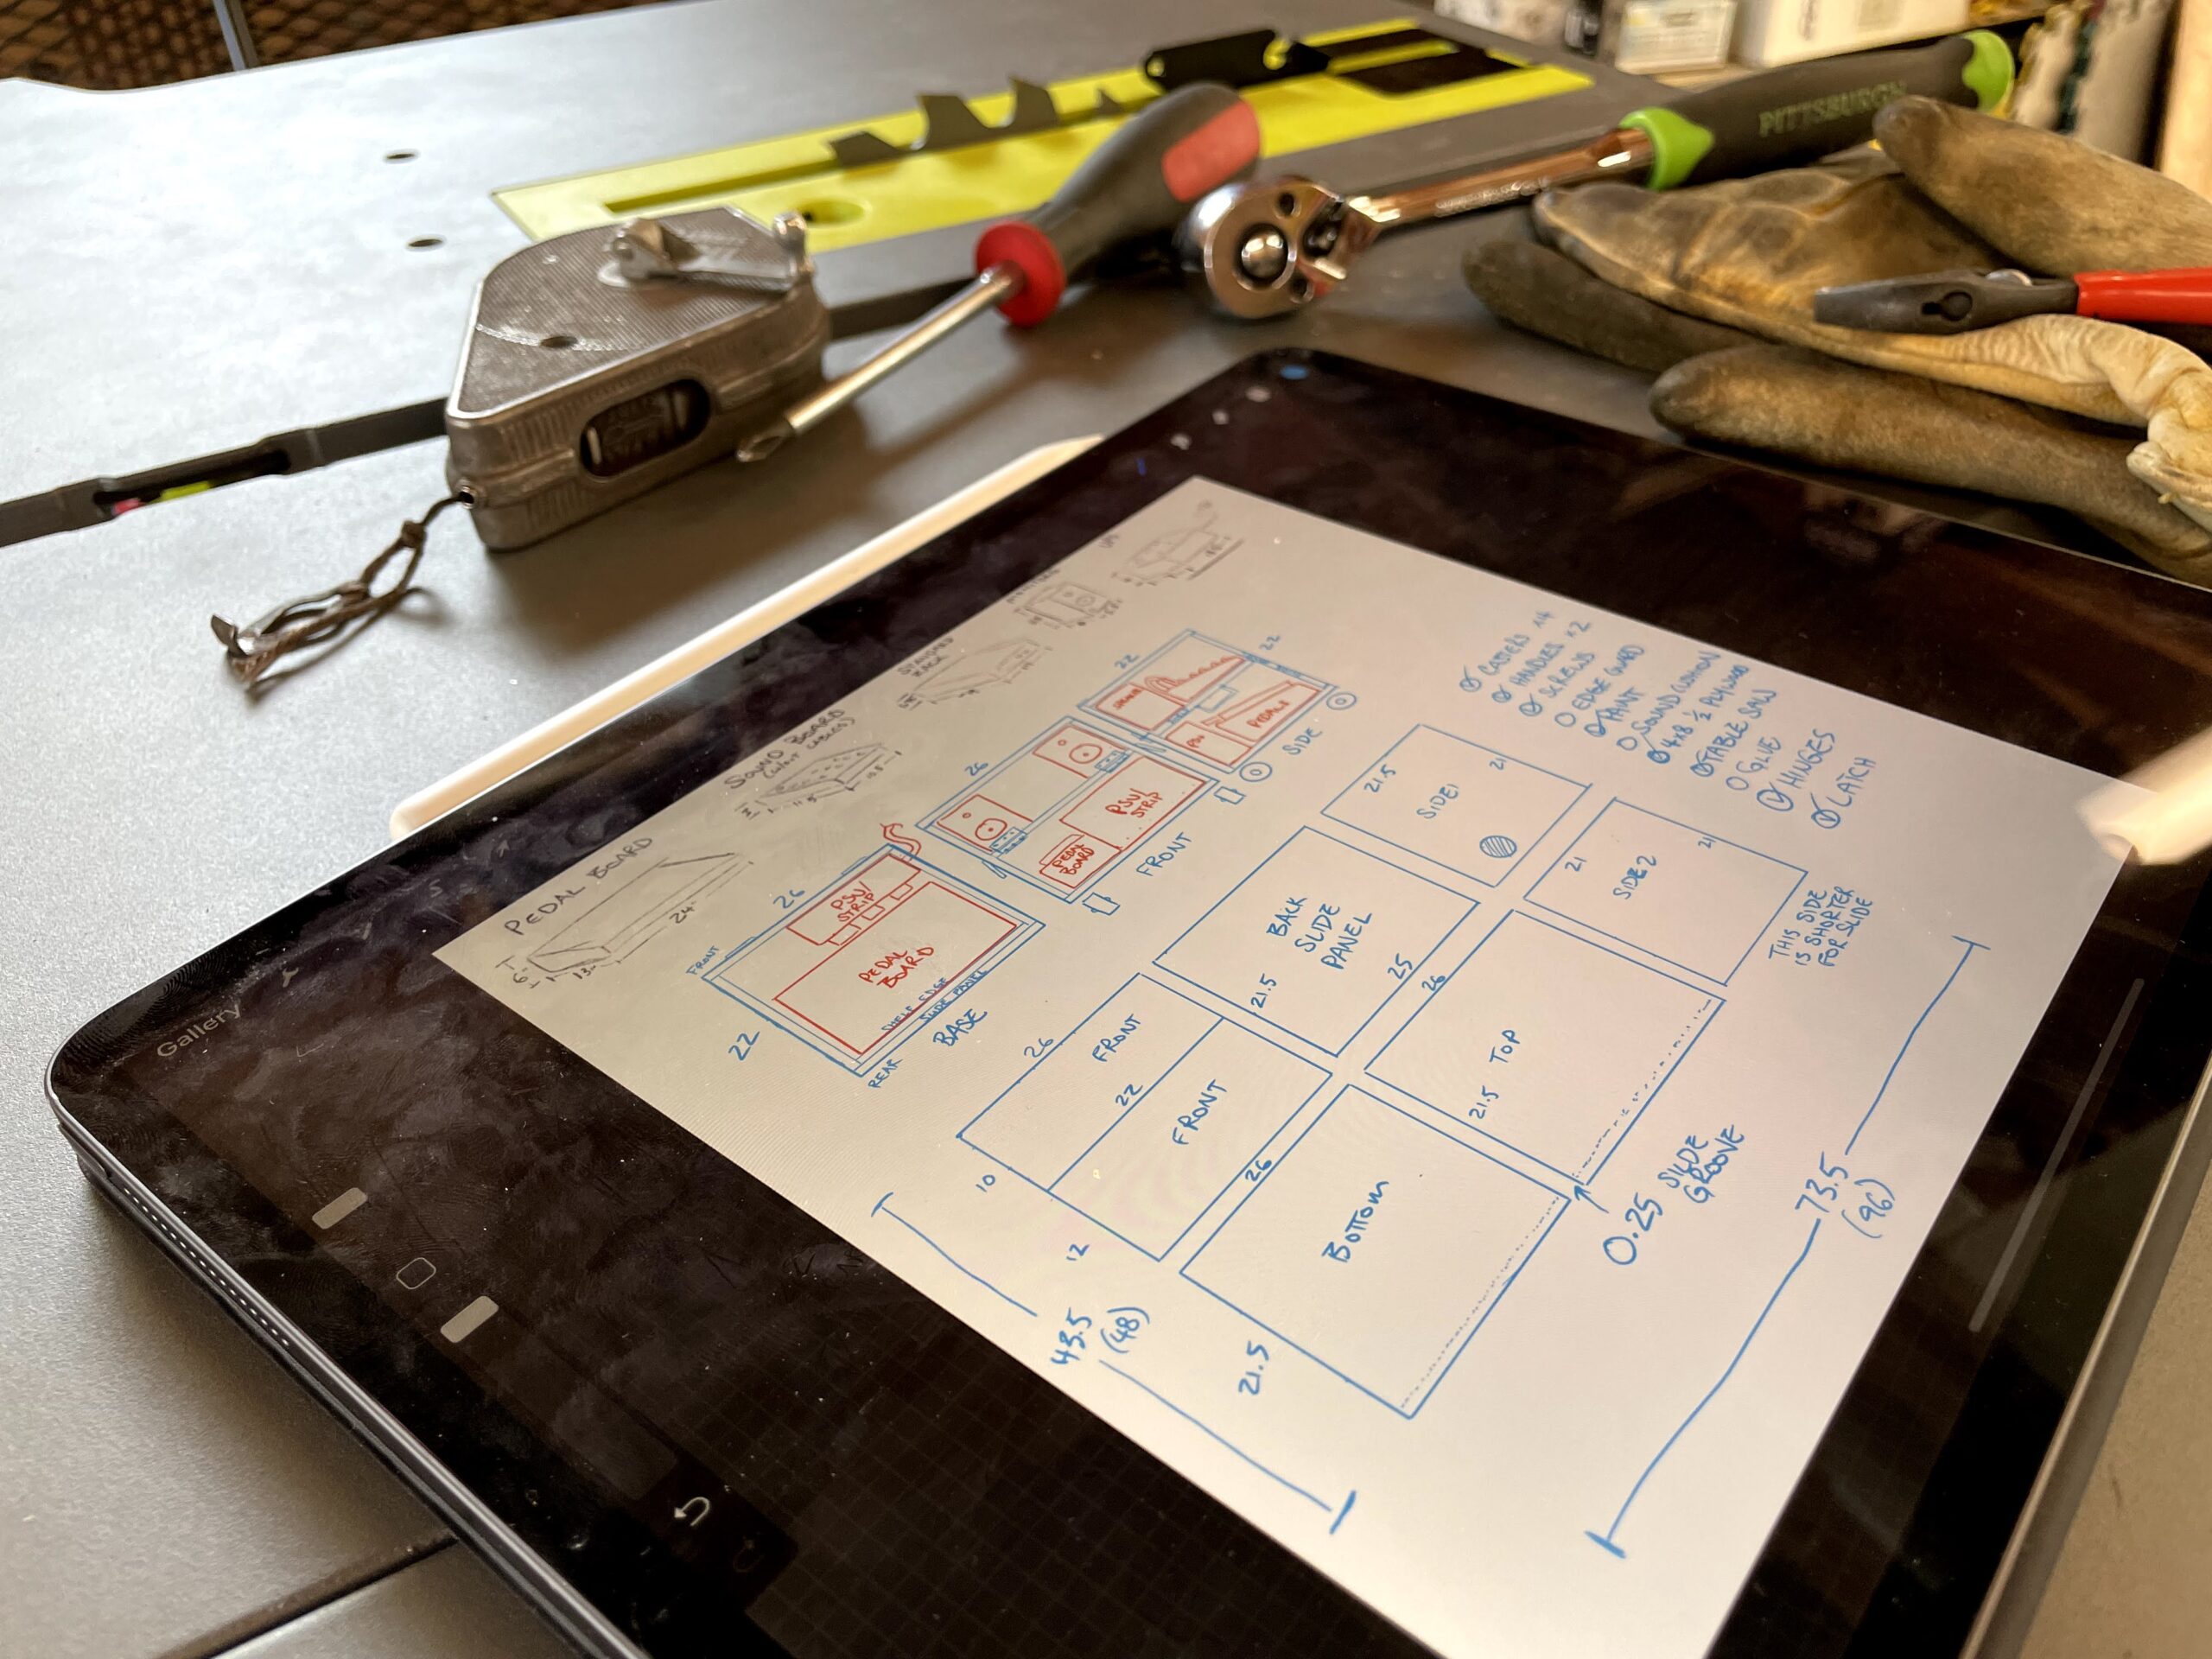
I started taking measurements and sketching plans on my iPad and the “gig box” concept was born.
I liked the idea of a box with built-in speakers for small shows, or to use as monitors. I also liked the idea of being able to sit on it and practice at home. I sketched some more ideas for the different ways it could be used.

I started with a simple plywood box. I used fairly heavy plywood so I wouldn’t need to reinforce it inside. I didn’t want supports in the way and taking up storage space inside. I also modified some of my original plans so that all of the pieces could be cut from a single sheet of plywood since the cost of plywood has gone way up.
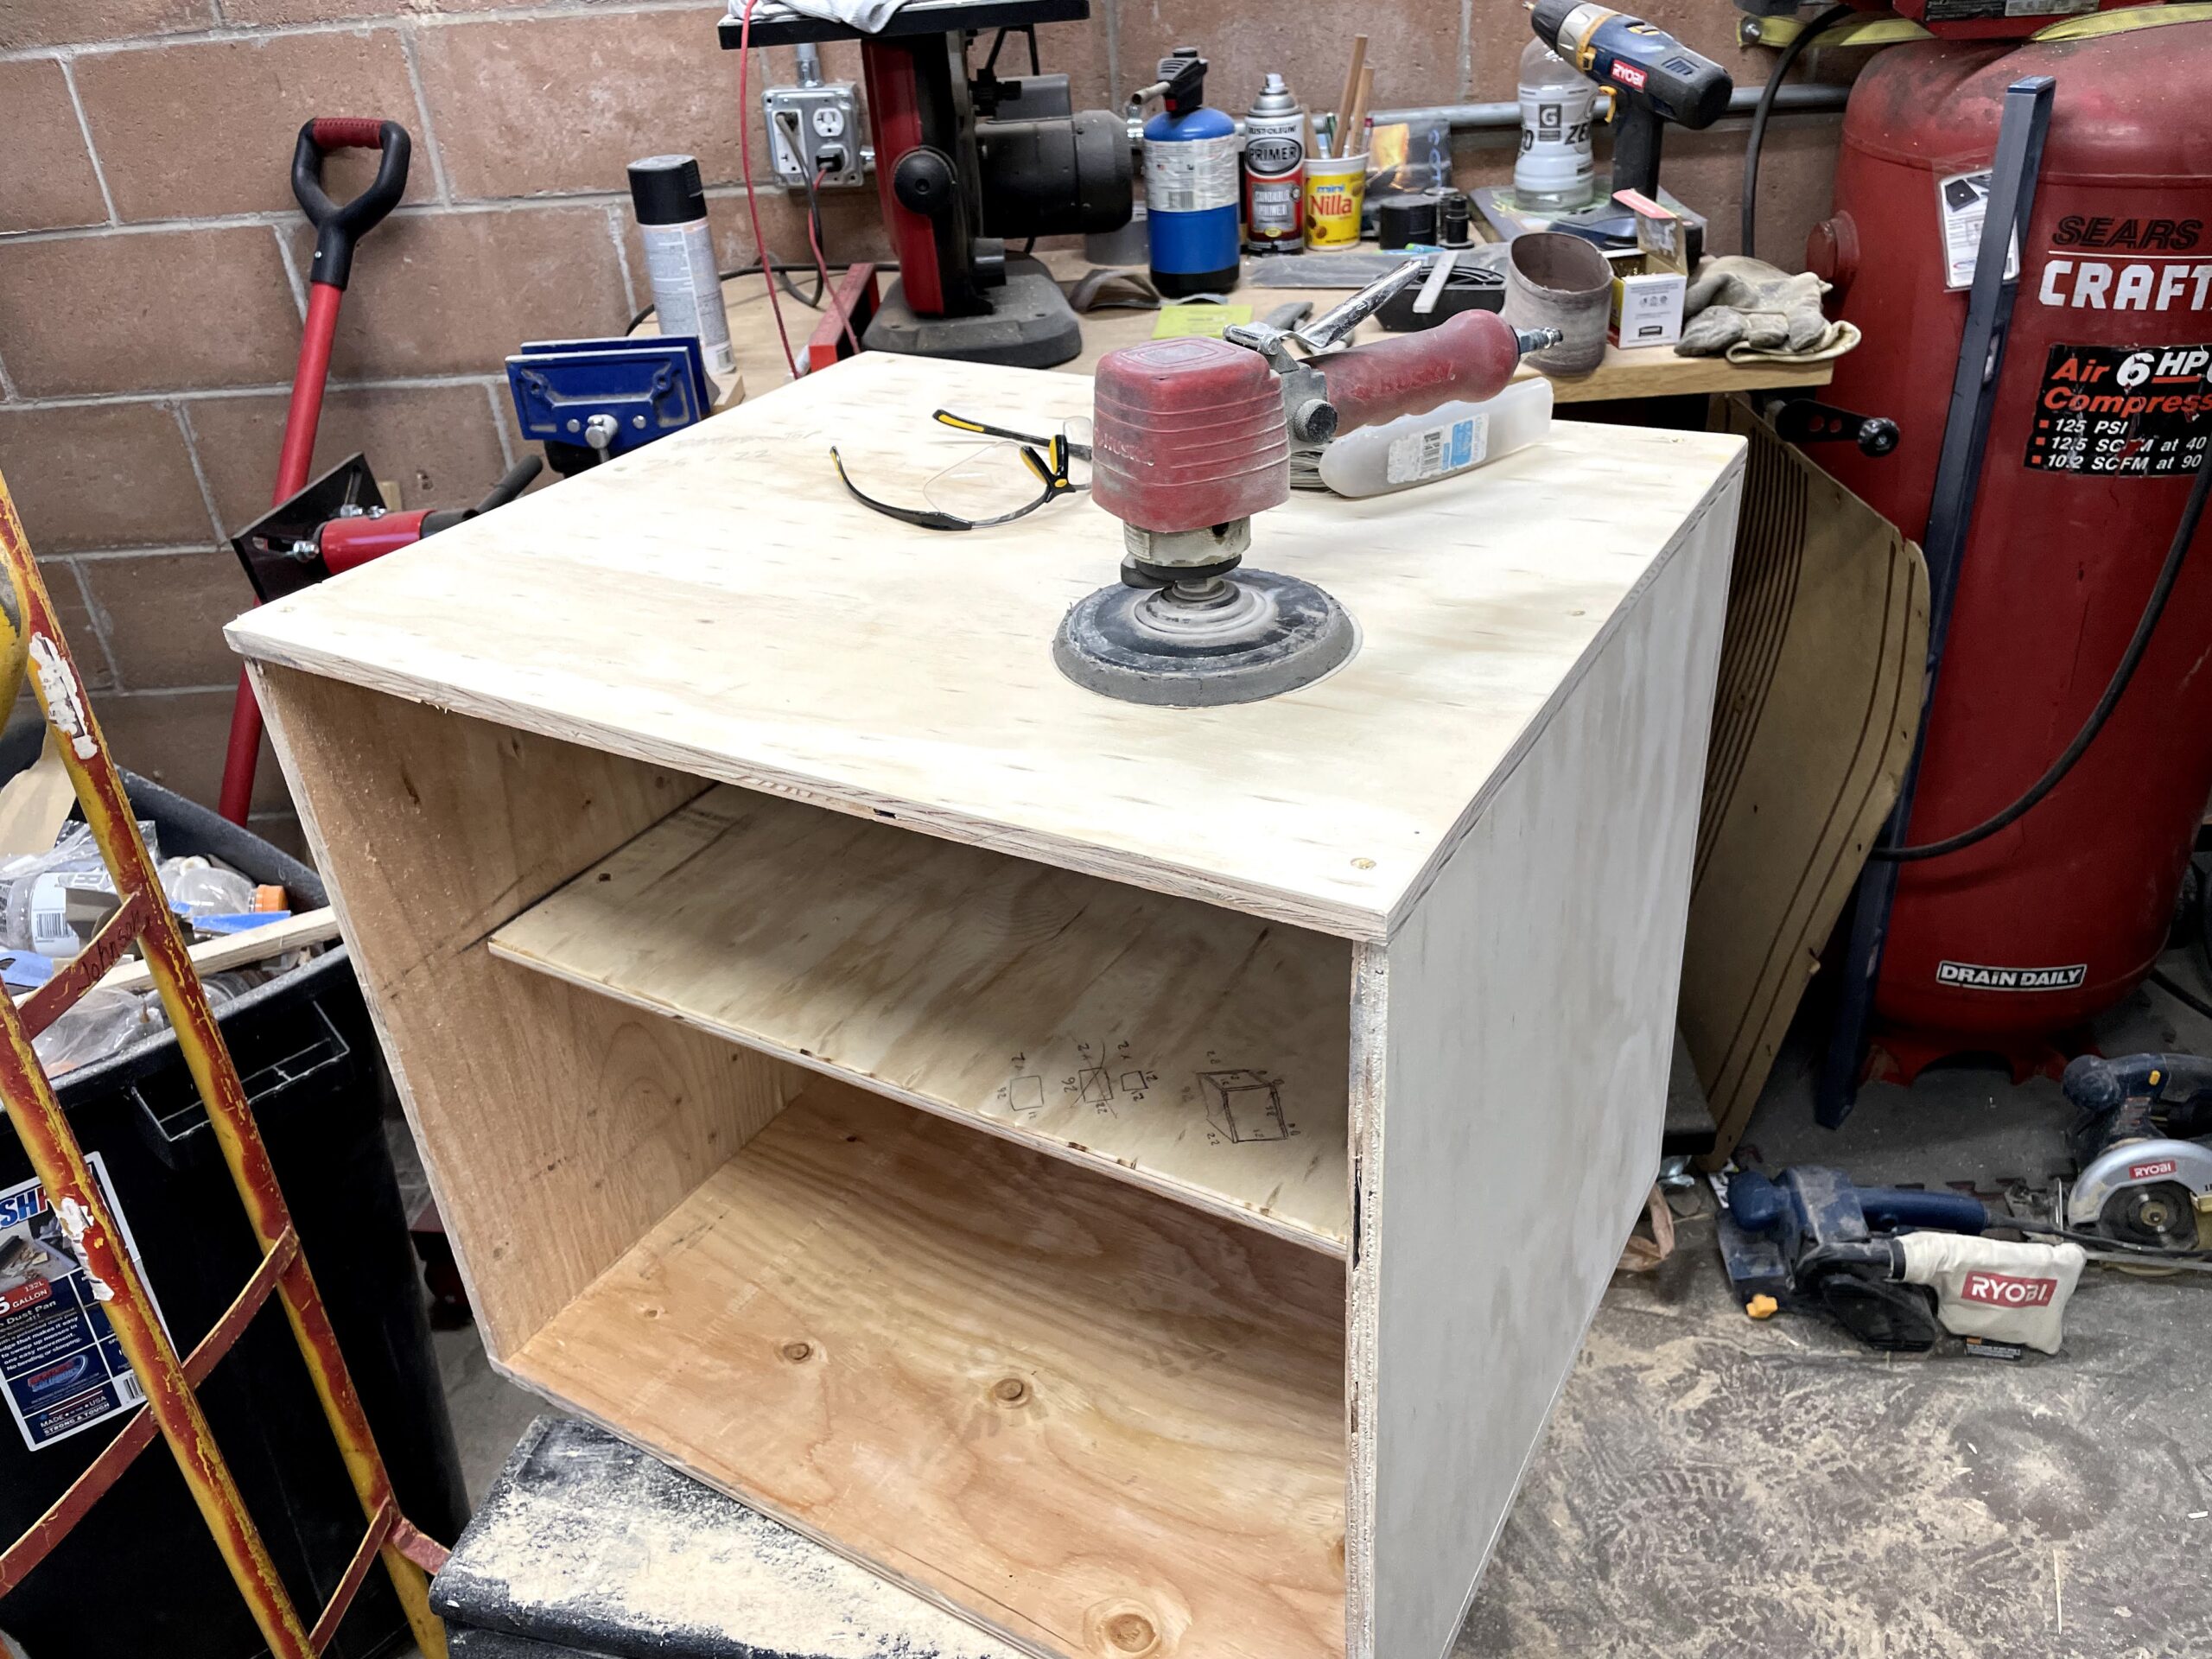
After a quick coat of primer, I put all my gear in the box and did some sound tests. I wasn’t sure if putting 50w studio monitors in a plywood box would result in terrible sound and bad vibration. The test went well, sound was a little bass-heavy but that was easy to adjust on the monitors (without changing the PA mix).
After verifying everything fit and sounded okay, I had to decide how to finish the box so it also looked nice. While moving the box around, I sliced my arm on the razor sharp corners so I put a 1/4″ round on all corners with a router.
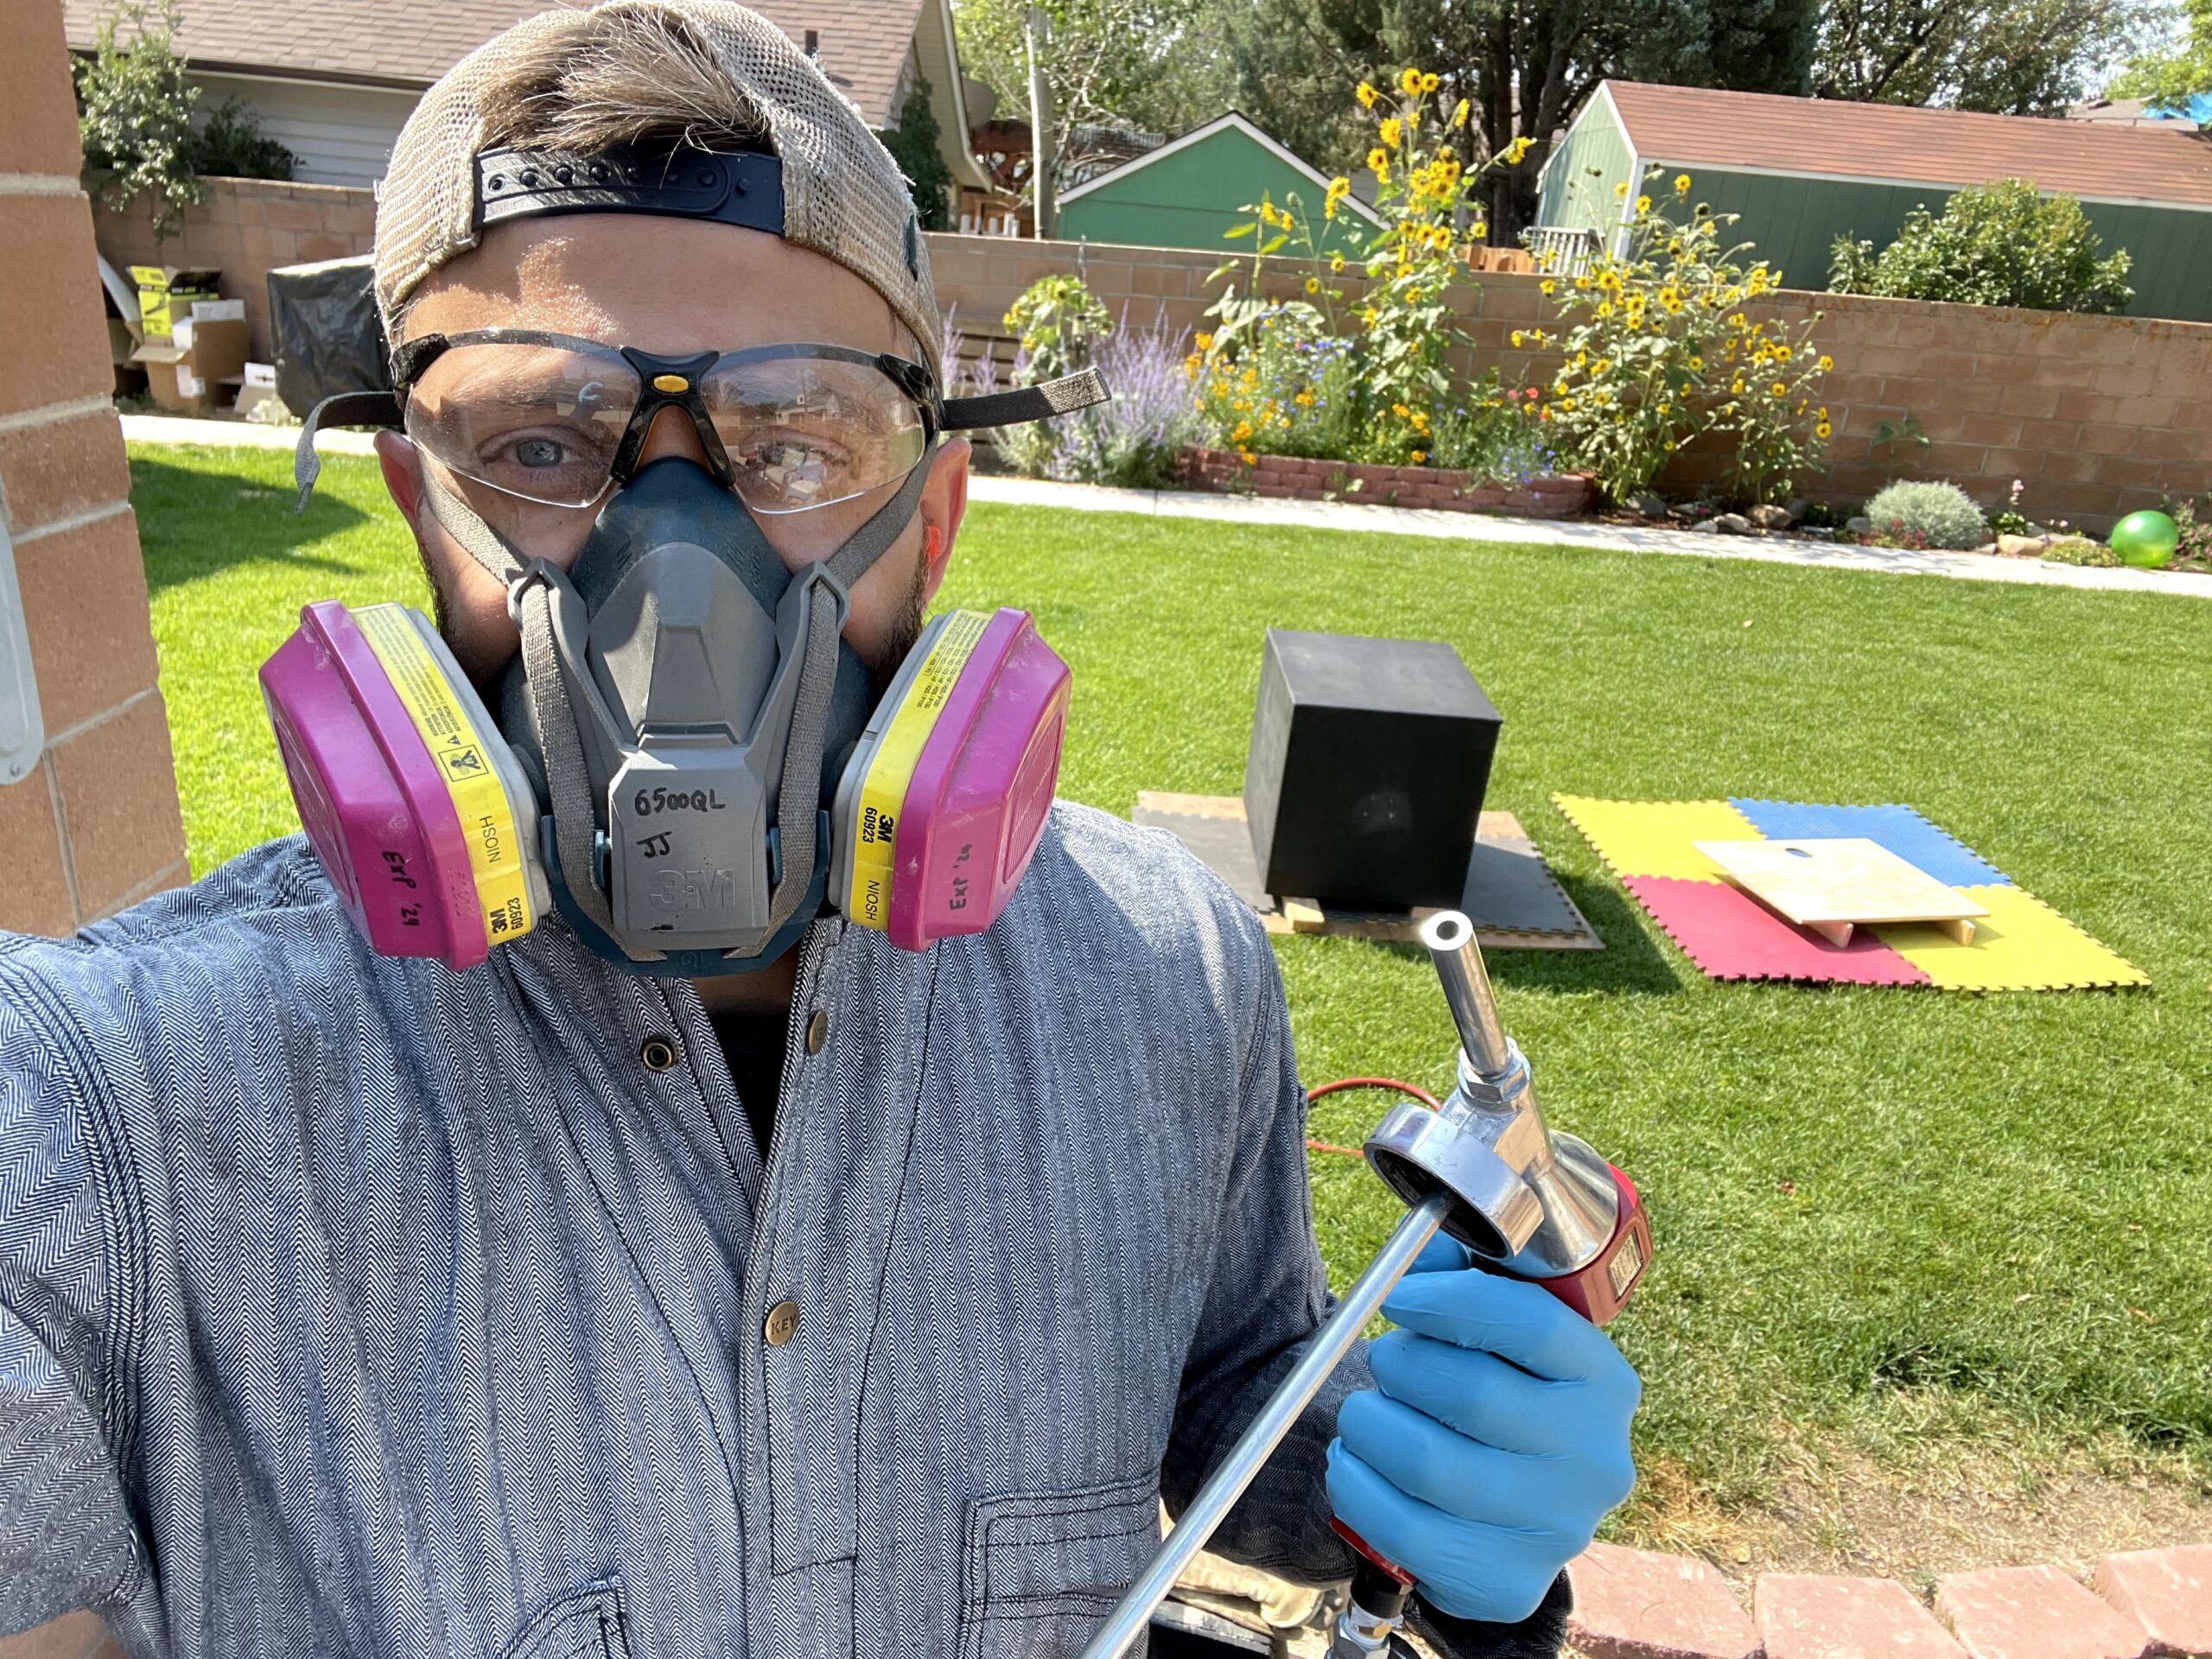
I had some UPol Raptor bedliner left over from a different project. Raptor is a two-part epoxy that you mix and spray with an undercoating gun. It creates a textured, plastic-like surface that hides imperfections and is extremely durable. I decided a bedliner coat would give the box great aesthetics and durability.
The epoxy is toxic and does not come off so I wore full overalls, eye protection (always) and a mask. I suited up and coated the box in 90F weather. I was soaked with sweat by the time I was done.
After coating the box, my spraying consistency wasn’t great. This resulted in slight differences in sheen. To make this look nice and consistent I gave it a final coat with a glossy black automotive enamel (spray paint).
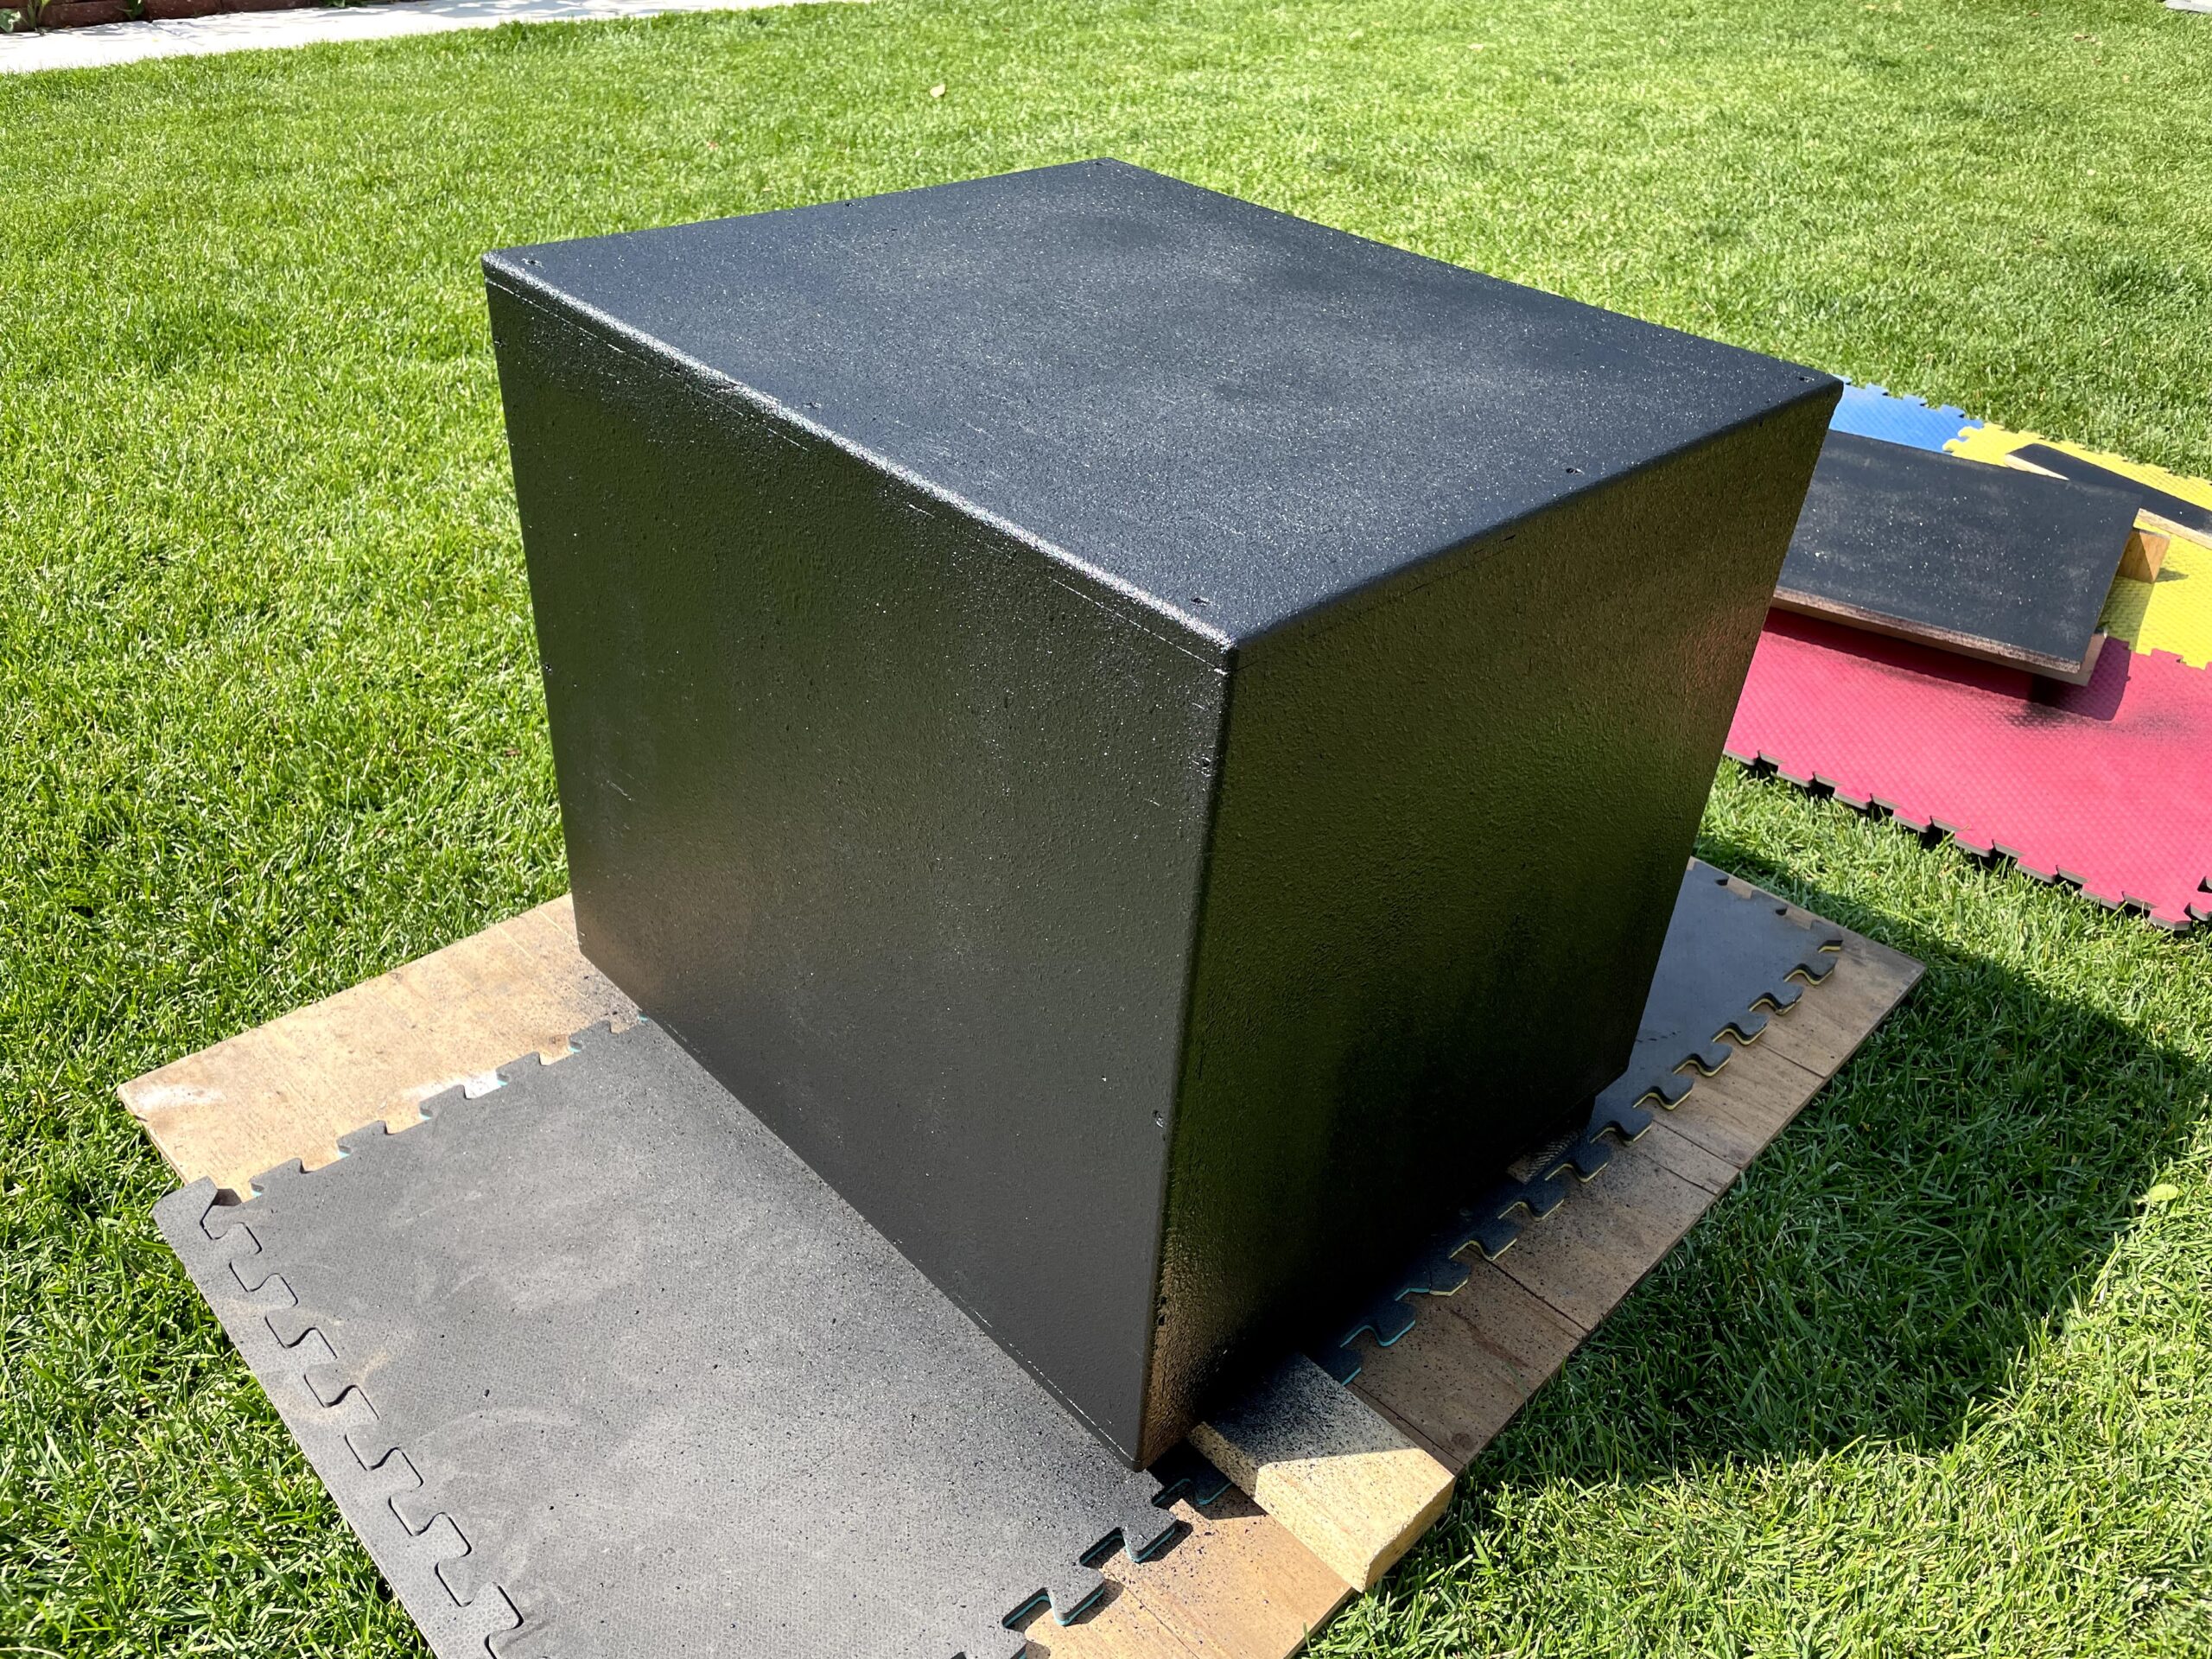
After allowing the coatings to off-gas for awhile, I put the hardware back on. Ultimately the box turned out great. It sounds pretty good and could be used alone for a coffee-shop or other small gig. But it has a mixed XLR out from the soundboard so it can also be plugged into a house PA and the internal speakers used as monitors.
Things I would change:
- The box is just a little tall for comfortable sitting. When I planned the height, I under-estimated the height of the casters.
- I originally didn’t plan to coat the box. I bought plywood that I thought would look nice. It did not. If I did this again I would probably use MDF because it’s cheaper and possibly lighter.
- I used a 1/4″ roundover on the edges but the standard for amps and other music equipment is 1/2″. If I put a larger roundover on the edges I could put classy metal corner protectors that would look good.
- I mounted the handles in the center so they could screw into the interior shelf supports for more strength. It would be easier to carry if they were mounted higher. They make inset handles that would be harder to build but would look and function better
- The casters are small enough that they don’t roll over things well. Slightly larger, and higher-quality casters would make rolling better.
- The door is just friction-fit. Some type of locking hardware would be safer, it could fall out while being hauled – especially with temperature changes.
- The top plywood sags a bit under my weight. It could either use a support or heavier wood.
Ultimately it turned out really well, despite some changes and missteps during construction. Here are pictures of the final product.
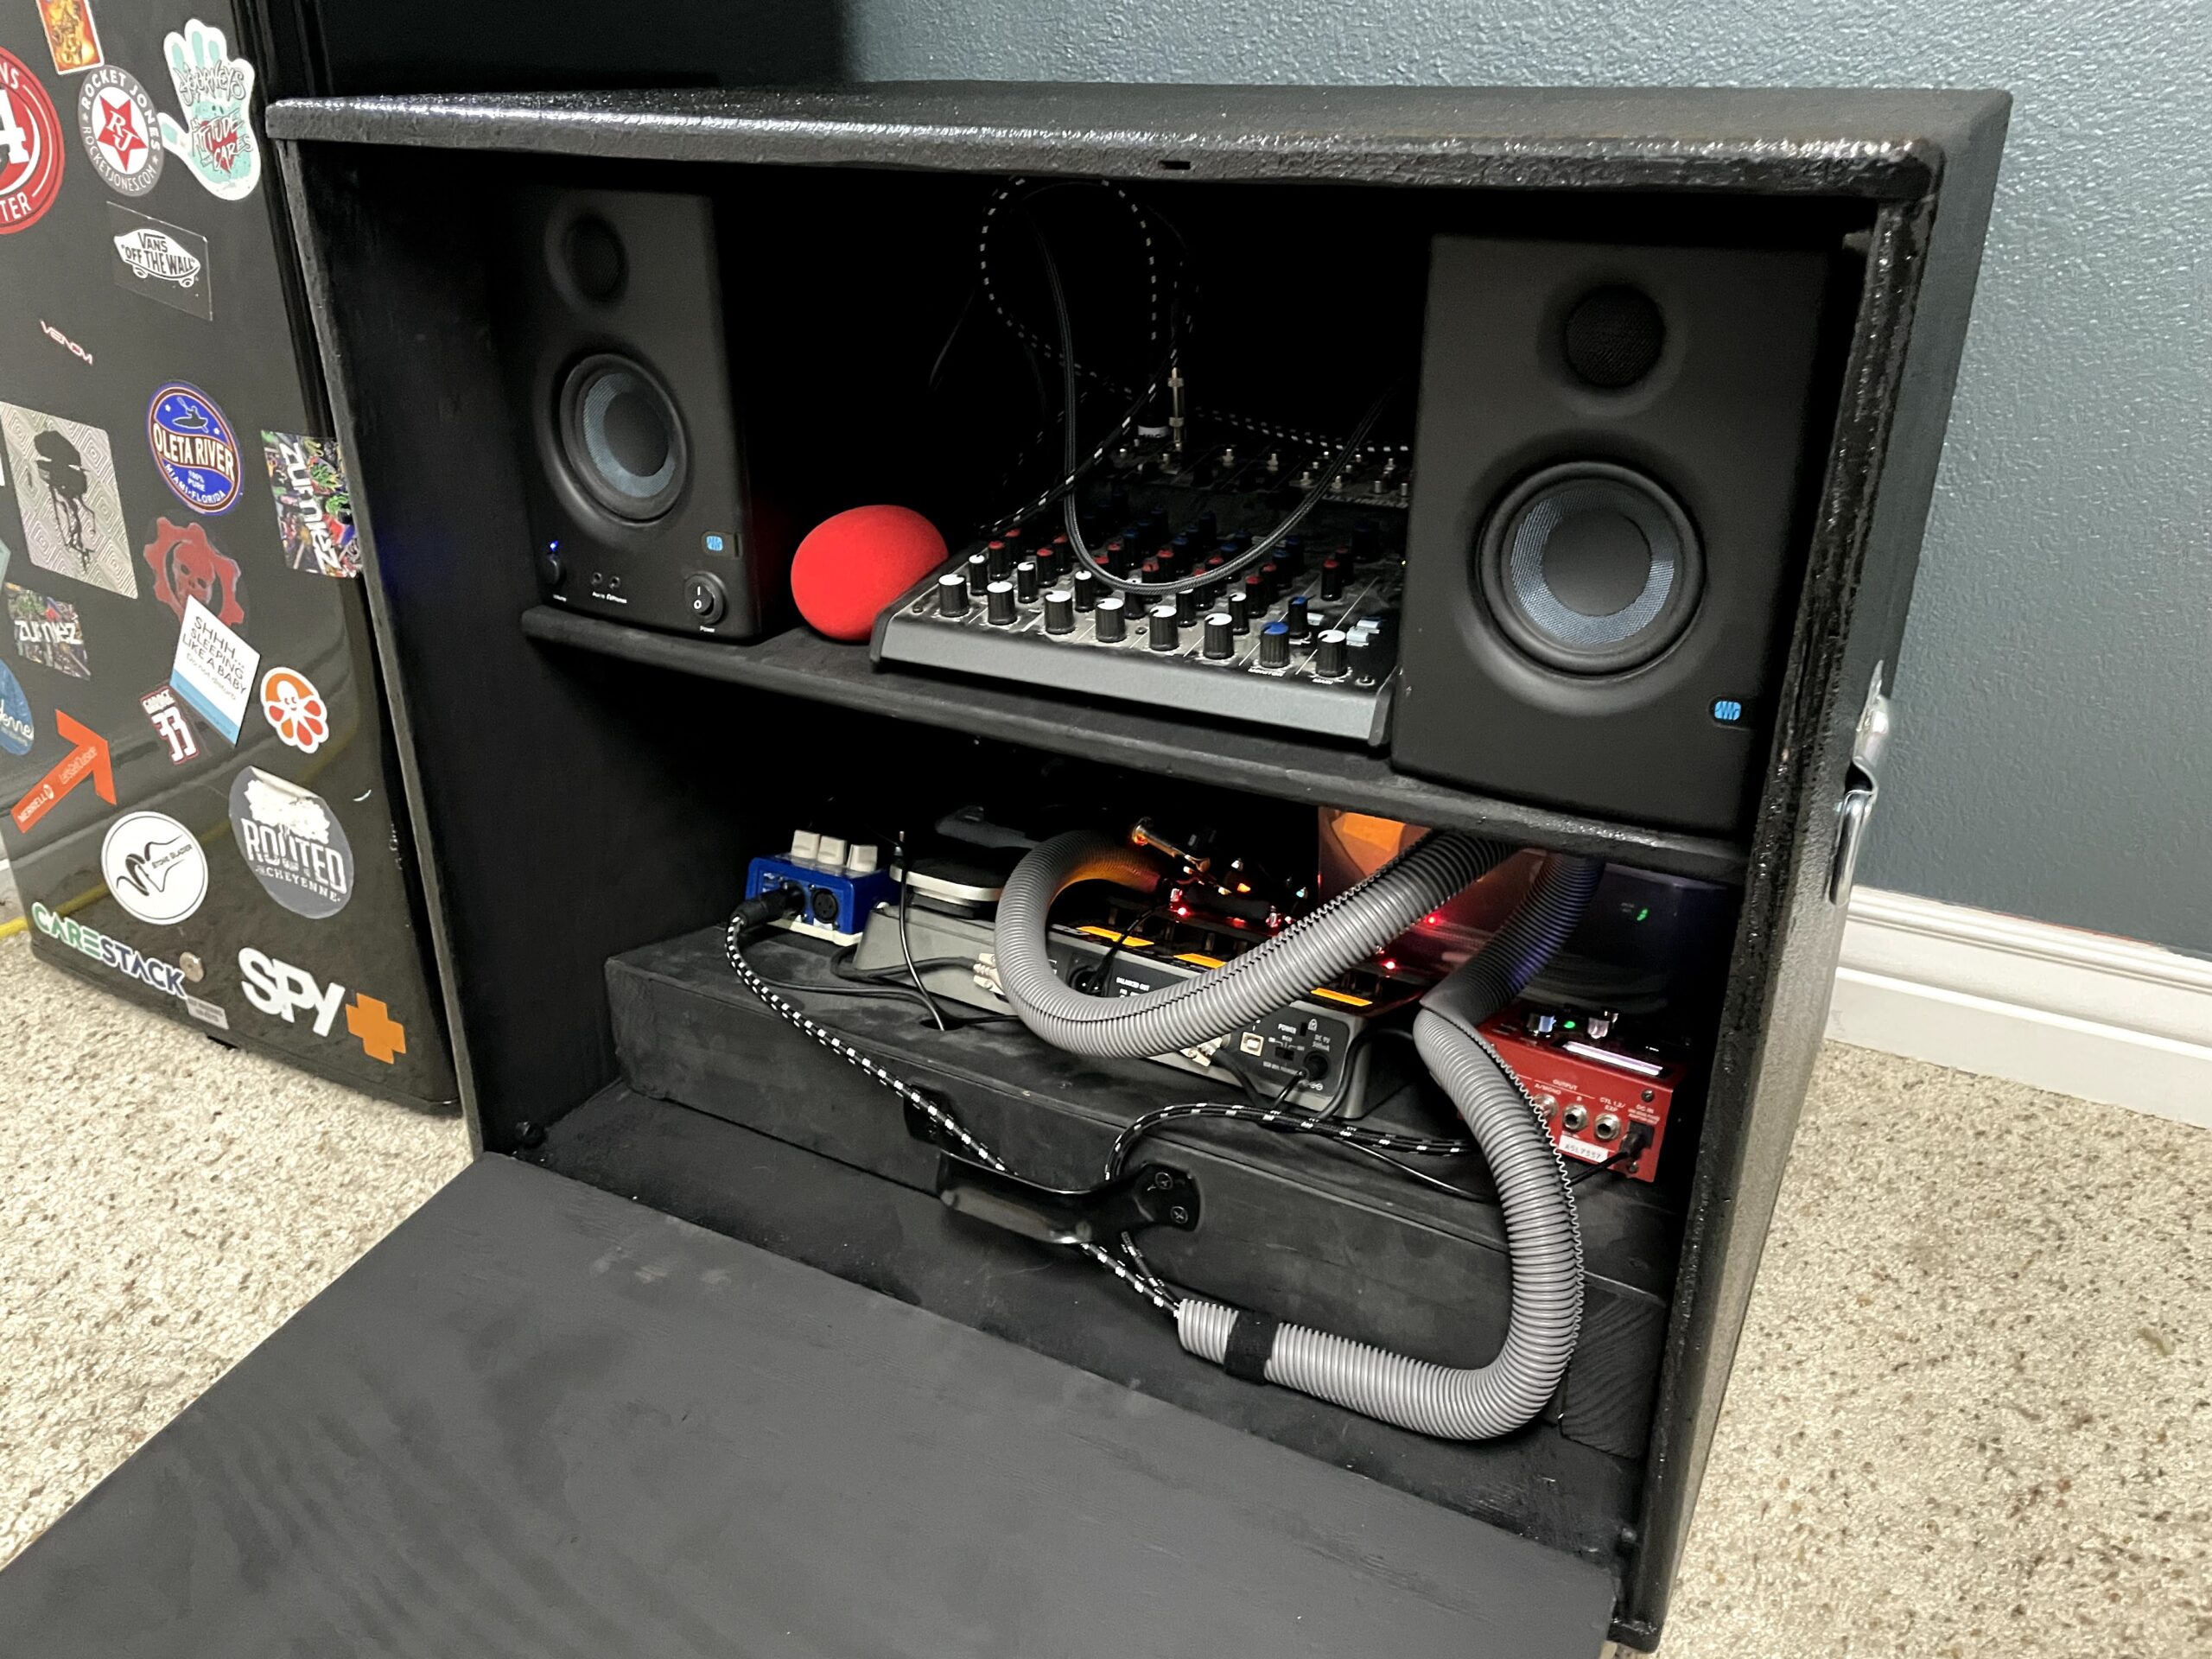
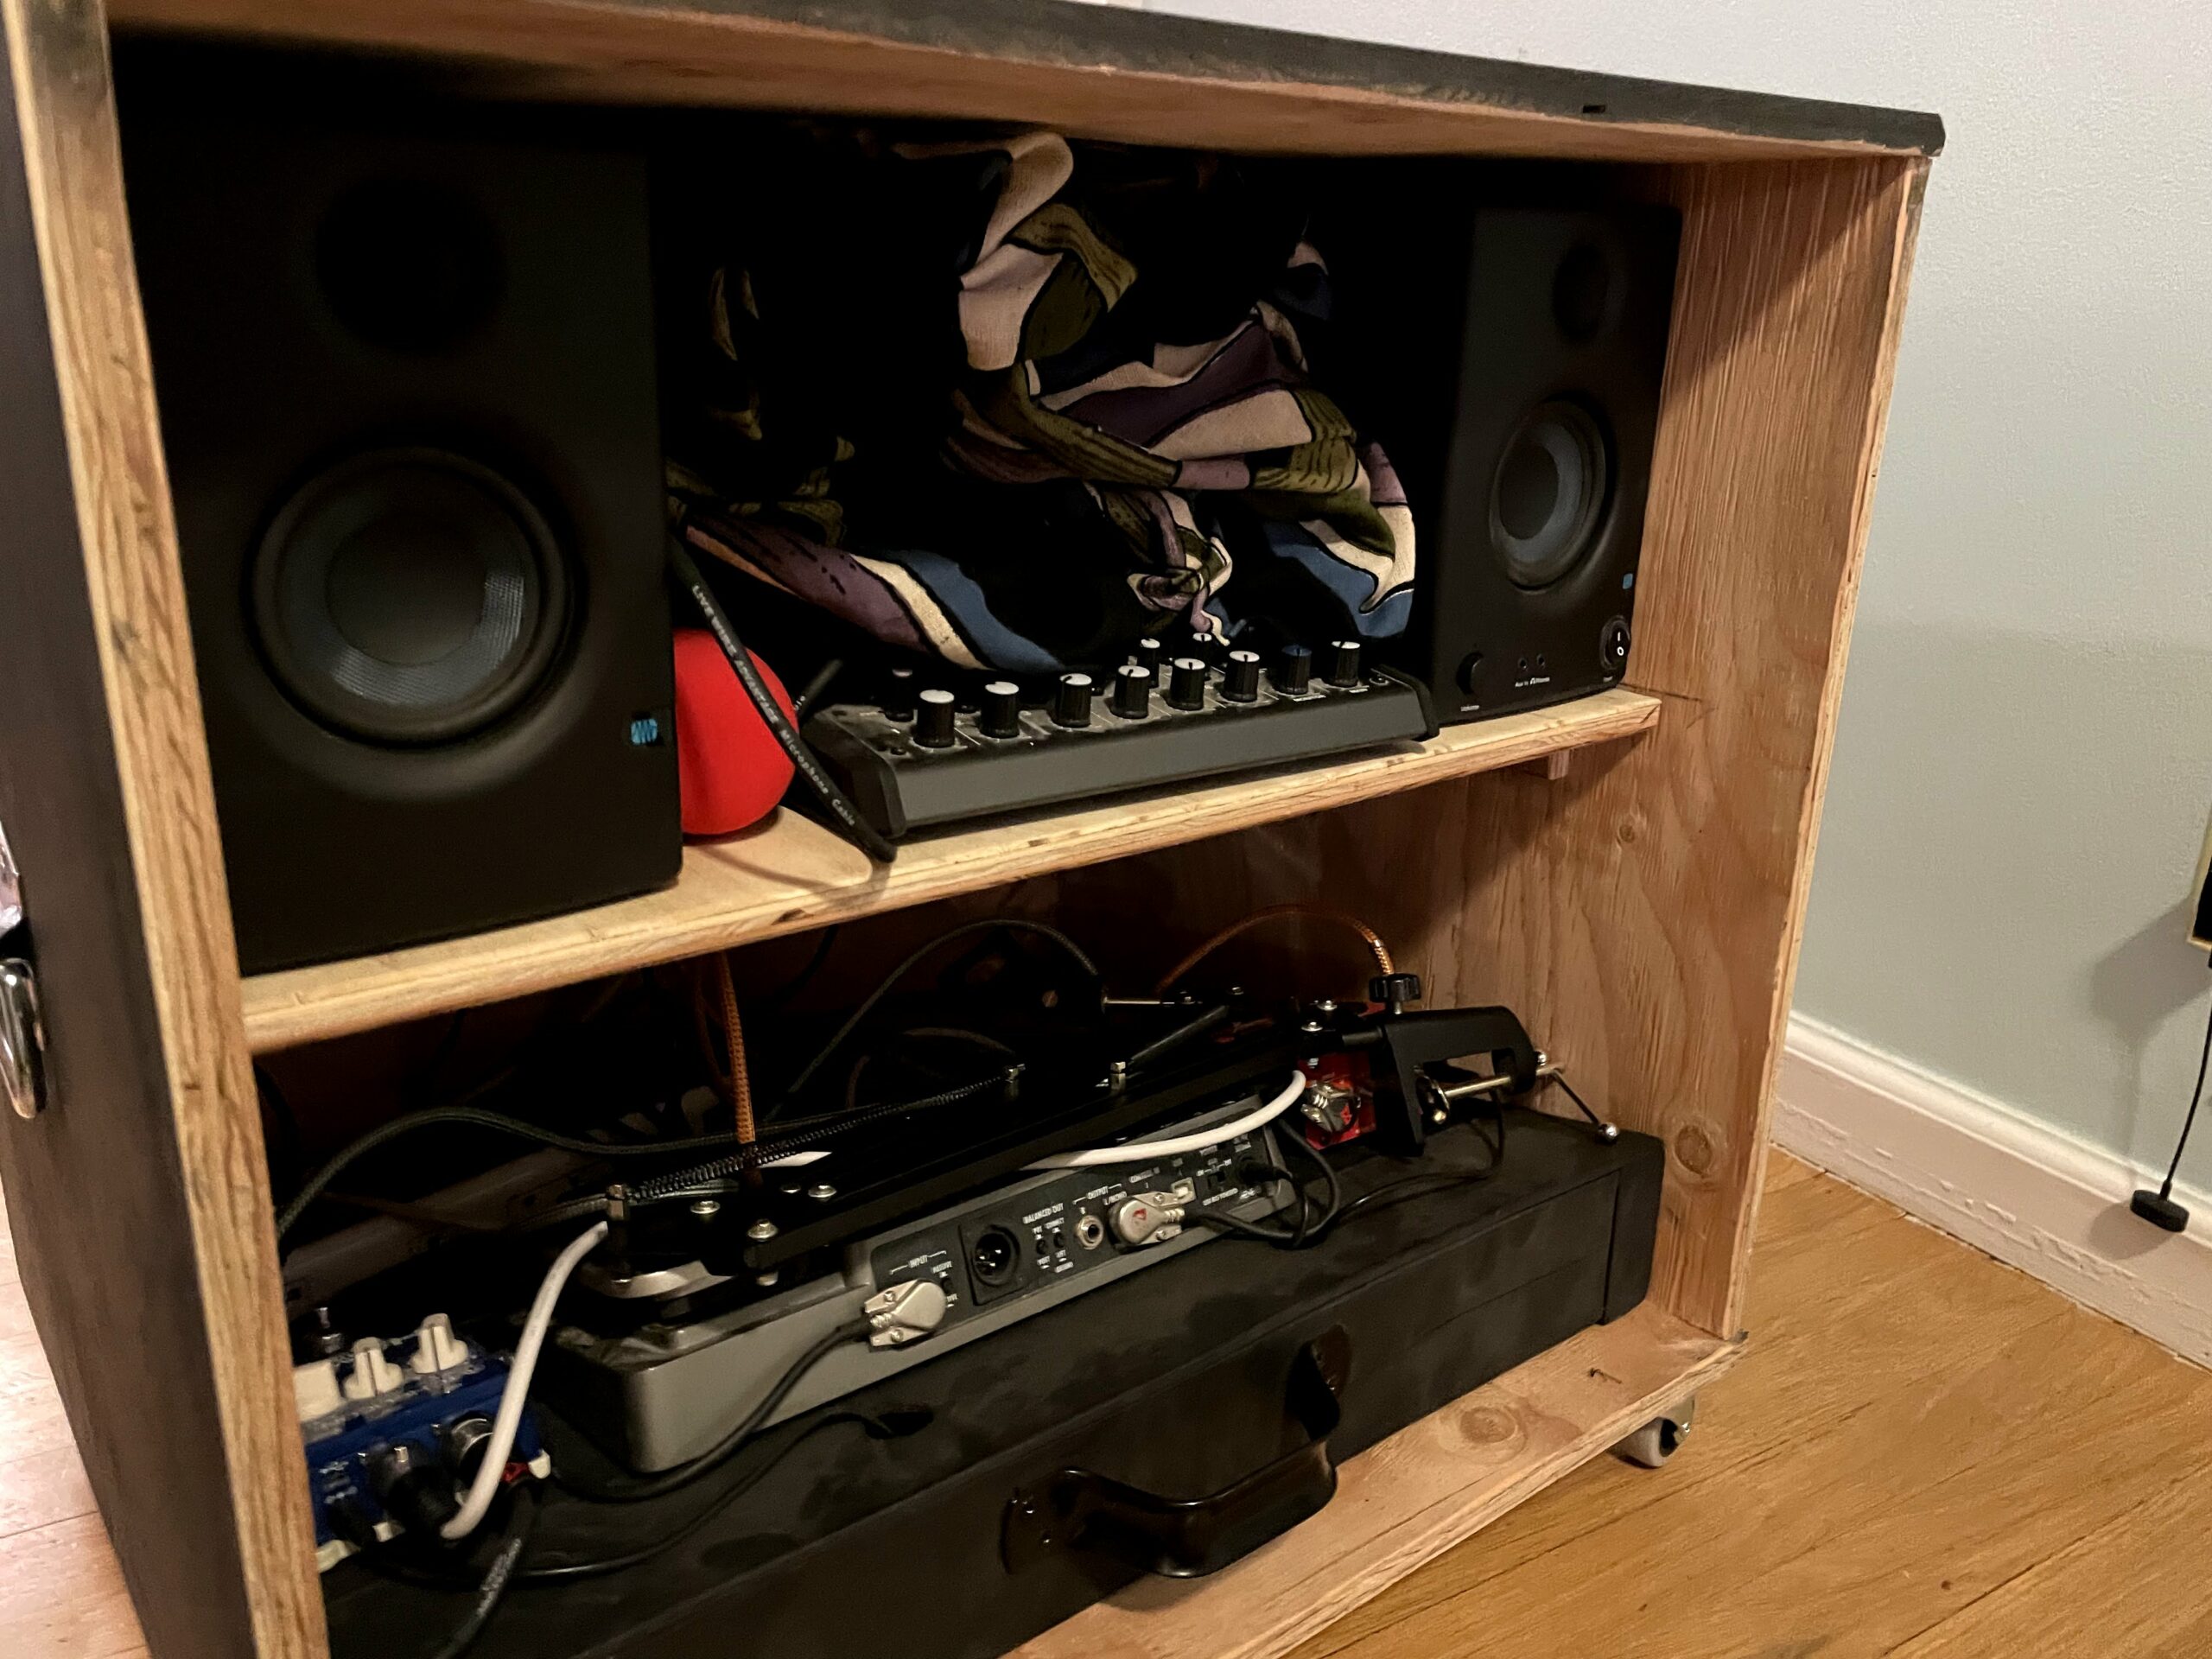
This is the gig box where you can kinda see the overall size. With all gear inside it is pretty heavy – better to move with two people.
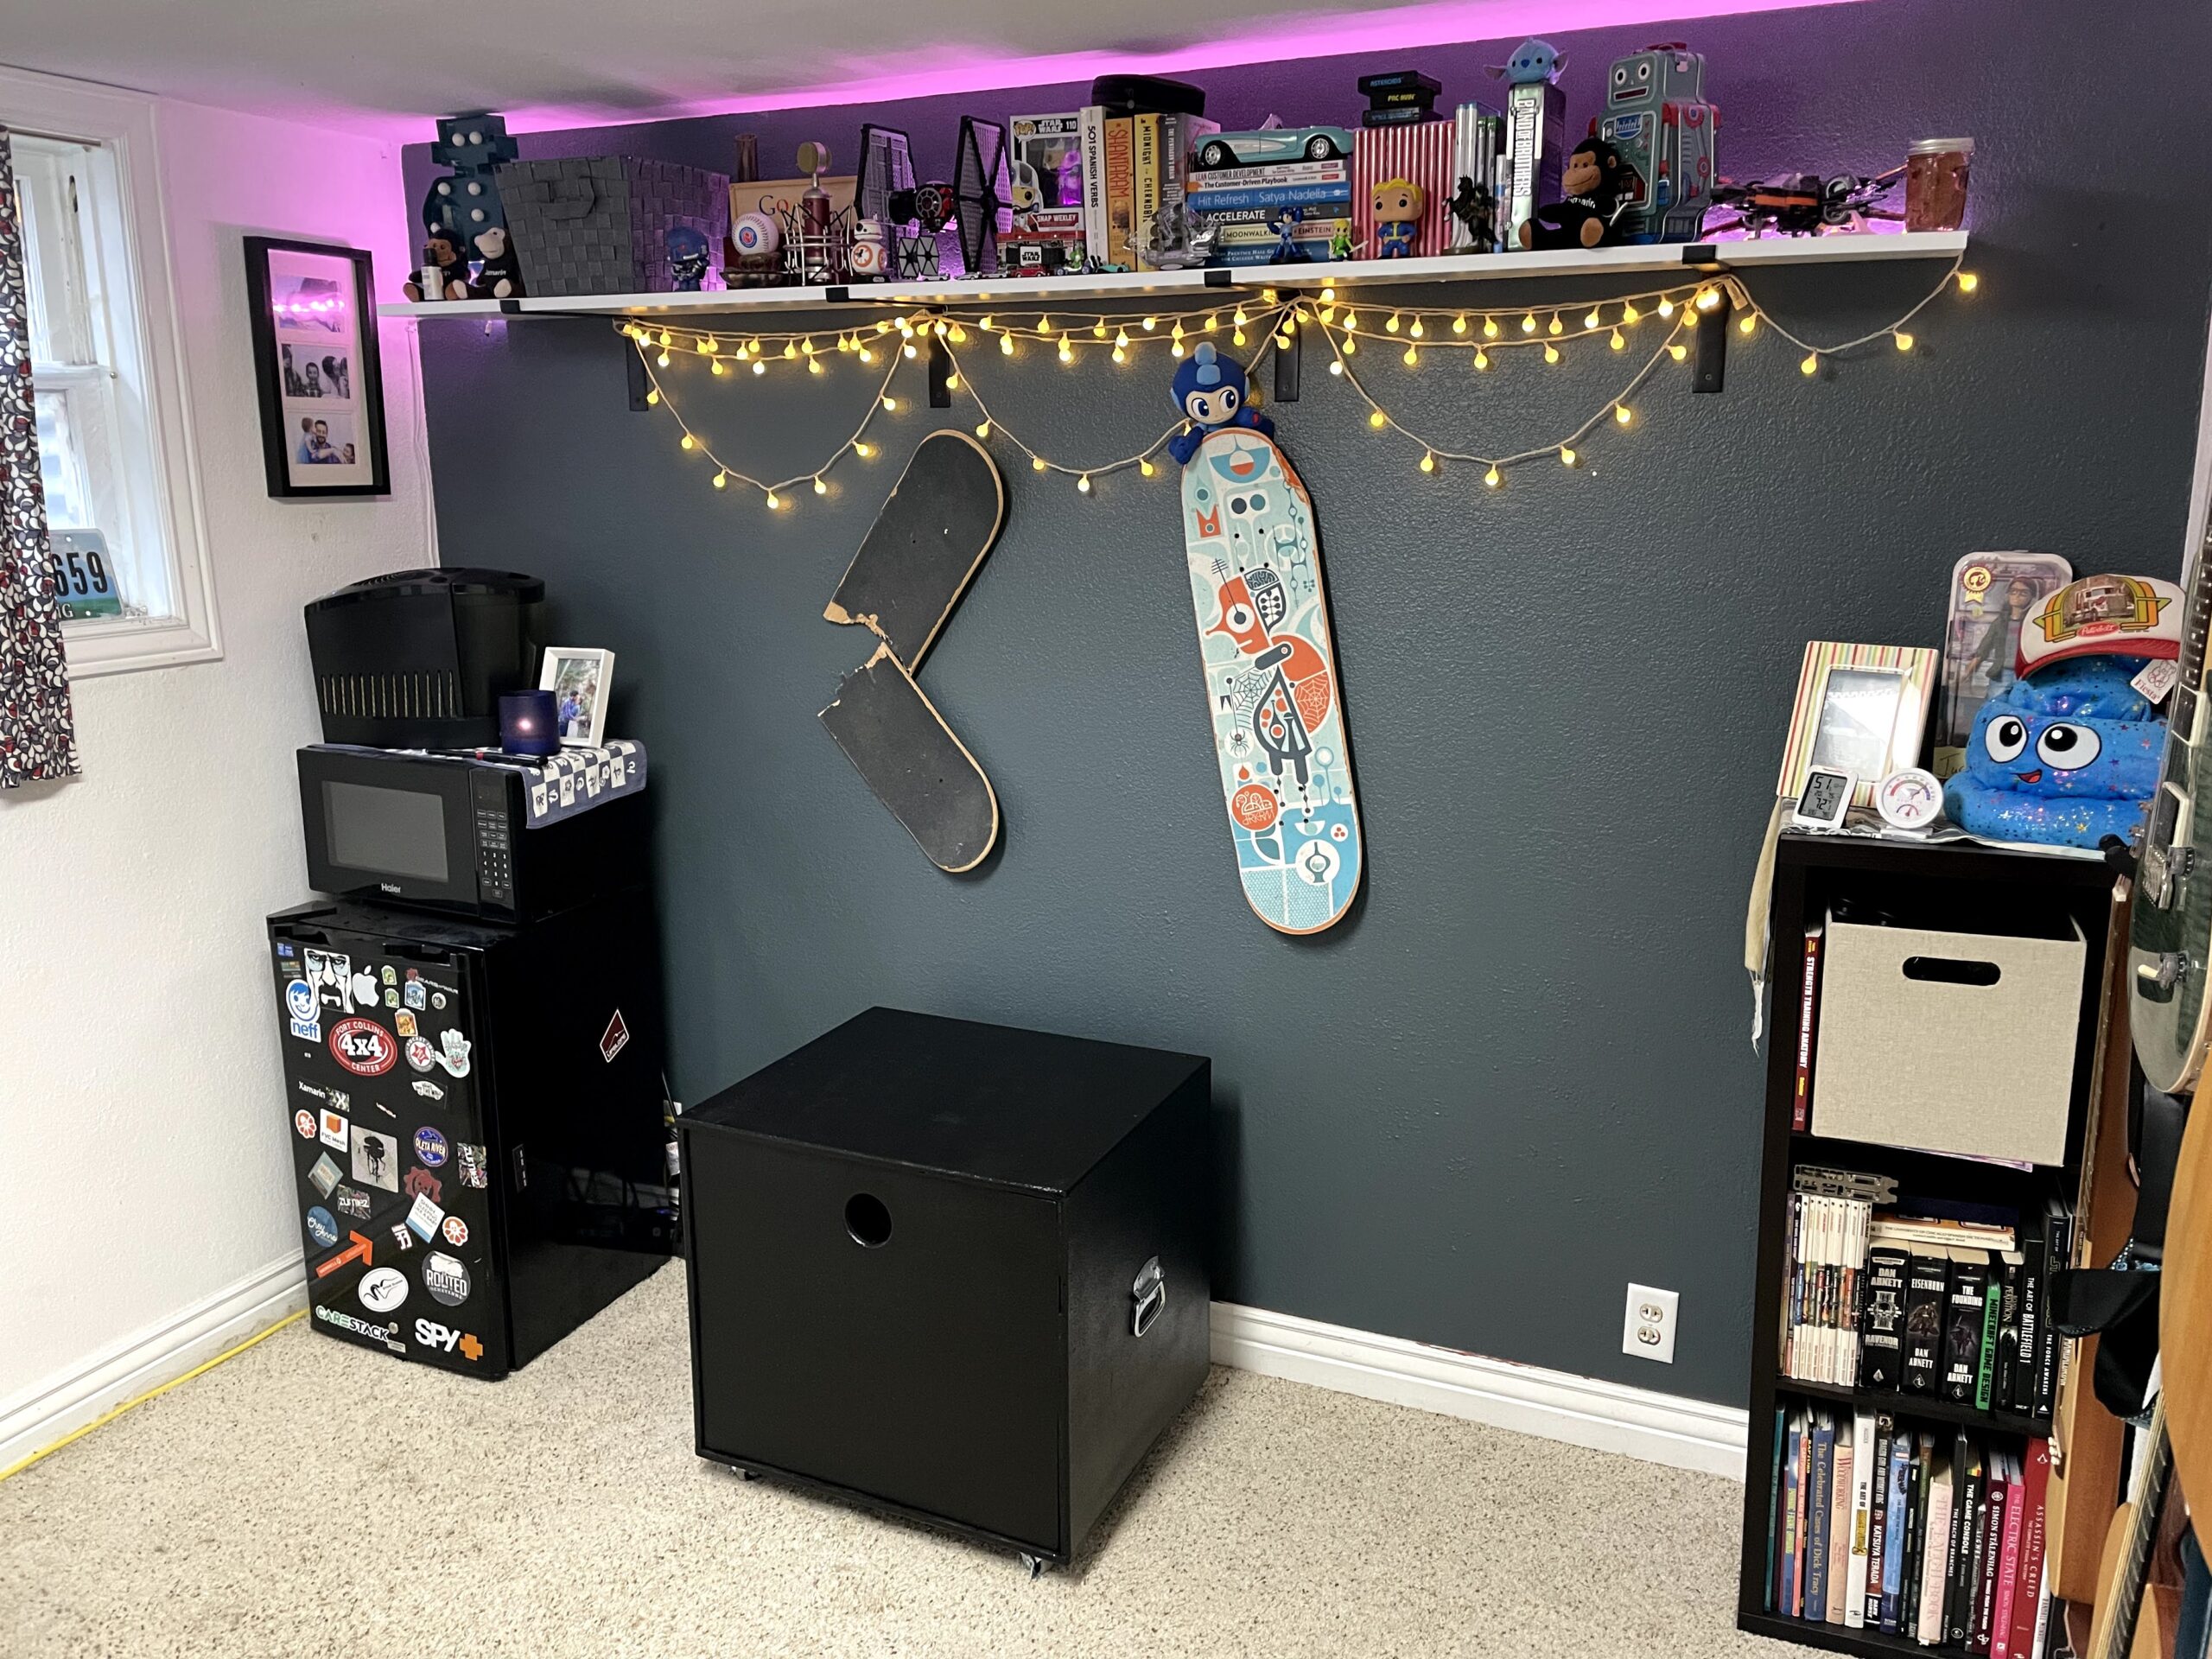
Here’s the box in practice mode. It only takes a minute to pull out the pedal board, clamp on a mic arm, and then sit on top and play. The studio monitors have built in amps and are plenty loud for small rooms. the soundboard can handle 8 inputs and has a USB-out that can run directly into a computer or iPad for recording.
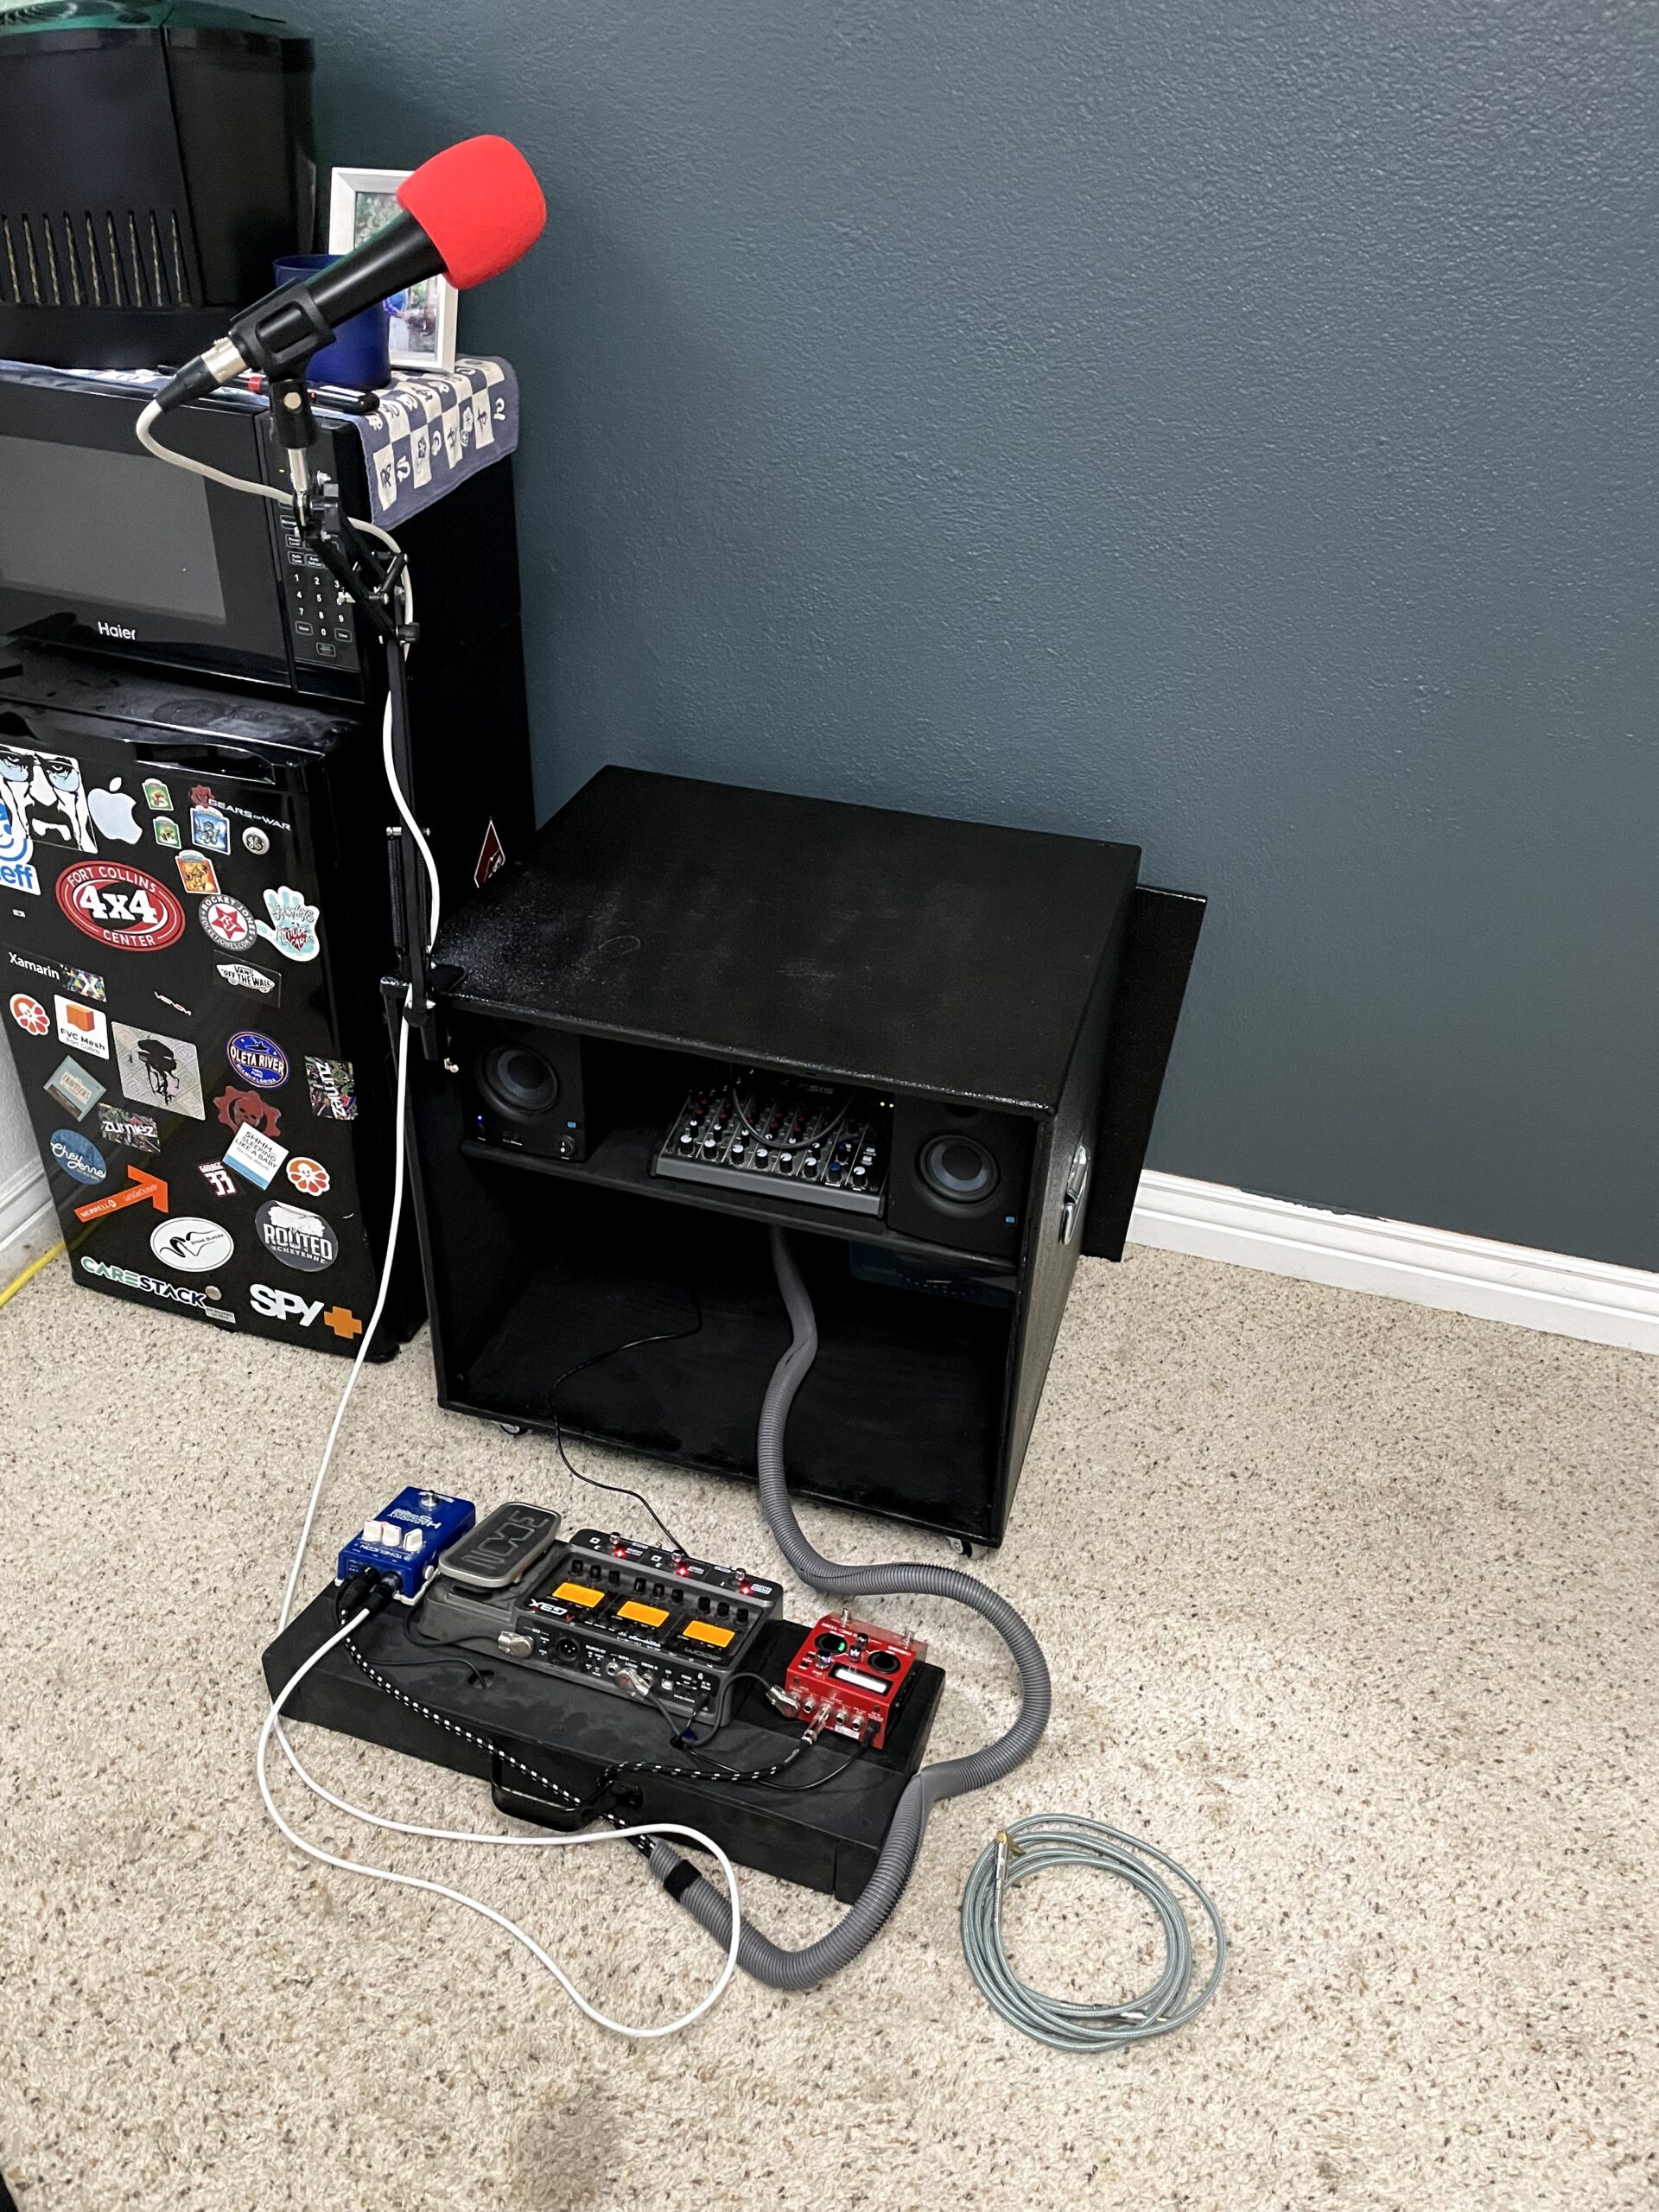
I use a vocal harmonics pedal, an amp-modeling pedal, and a rhythm/looper pedal. This allows me to run all signals into the soundboard without miking an amplifier. The studio monitors have built-in amplification and offer a flat signal, just like a PA. But they take up less space than a PA or monitors. This system would not scale well to a huge show but I only play small gigs. My favorite part of this is how small the footprint is for practicing at home, which is where 99% of my playing happens!