250mm Racing Quad ready for its maiden flight!
I have wanted to get into the R/C hobby since I was a kid but never had the money – it’s an expensive hobby. But prices are dropping as the hobby picks up more mainstream popularity! Recently I really caught the quadcopter bug. My software development company is part of a larger collective that has a DJI Phantom we use for aerial photography/video. It’s fun to fly but after watching folks like Charpu go nuts in FPV…I really wanted to build a more acrobatic craft.
One of the priorities for my development company is engaging young people in technology. It’s also a focus for Wyoming and specifically the Cheyenne community. We want to get kids of all ages interested in tech and keep them here in great jobs after college. Assuming my business can afford it, I’d like to run workshops in software development, game development, robotics, quad building/programming and 3D printing – basically share my love for all these fun technologies! So here’s my first foray into that space with a custom-built FPV-ready 250 racing quad!
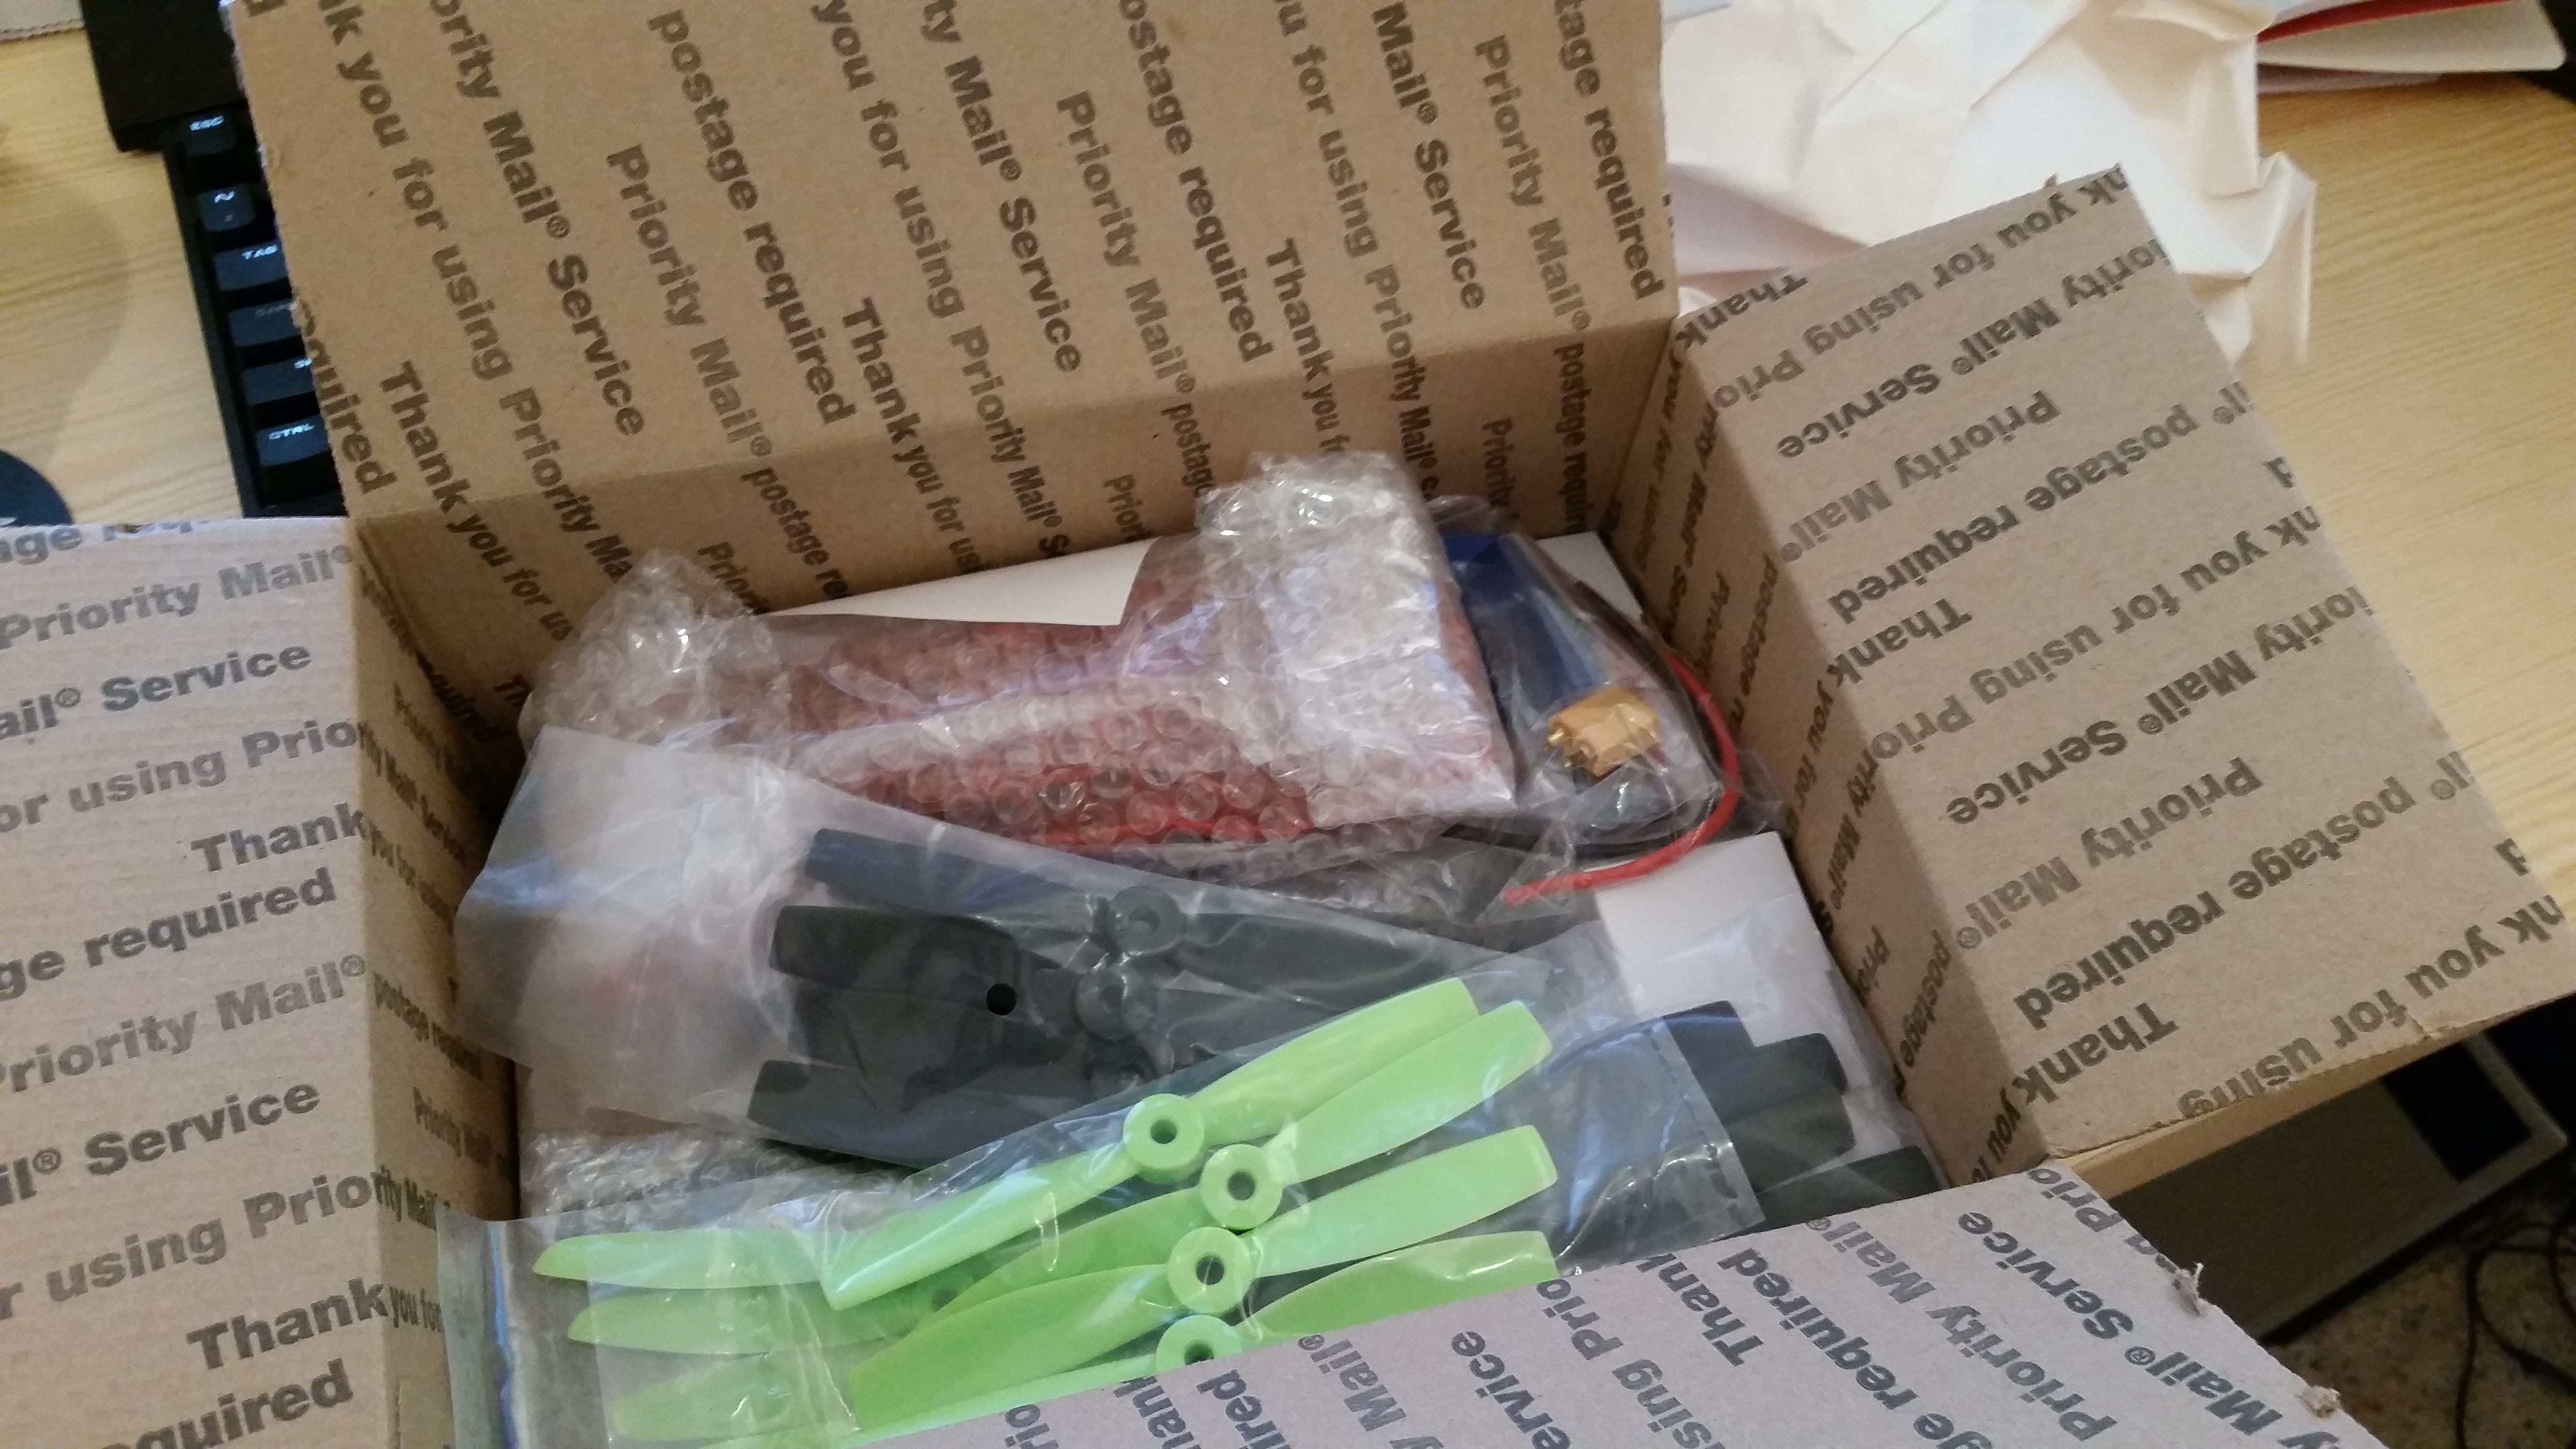
Carefully packaged goodies from MiniQuadBros
I bought the majority of drone parts from MiniQuadBros. They answered a lot of my questions and had great customer service. I can tell the guy that runs it loves to share his passion for the hobby. He gave me tons of advice, even on things that he doesn’t sell, and recommended sources for various parts. He shipped my stuff immediately when I ordered it on a Friday and it arrived the following Monday.
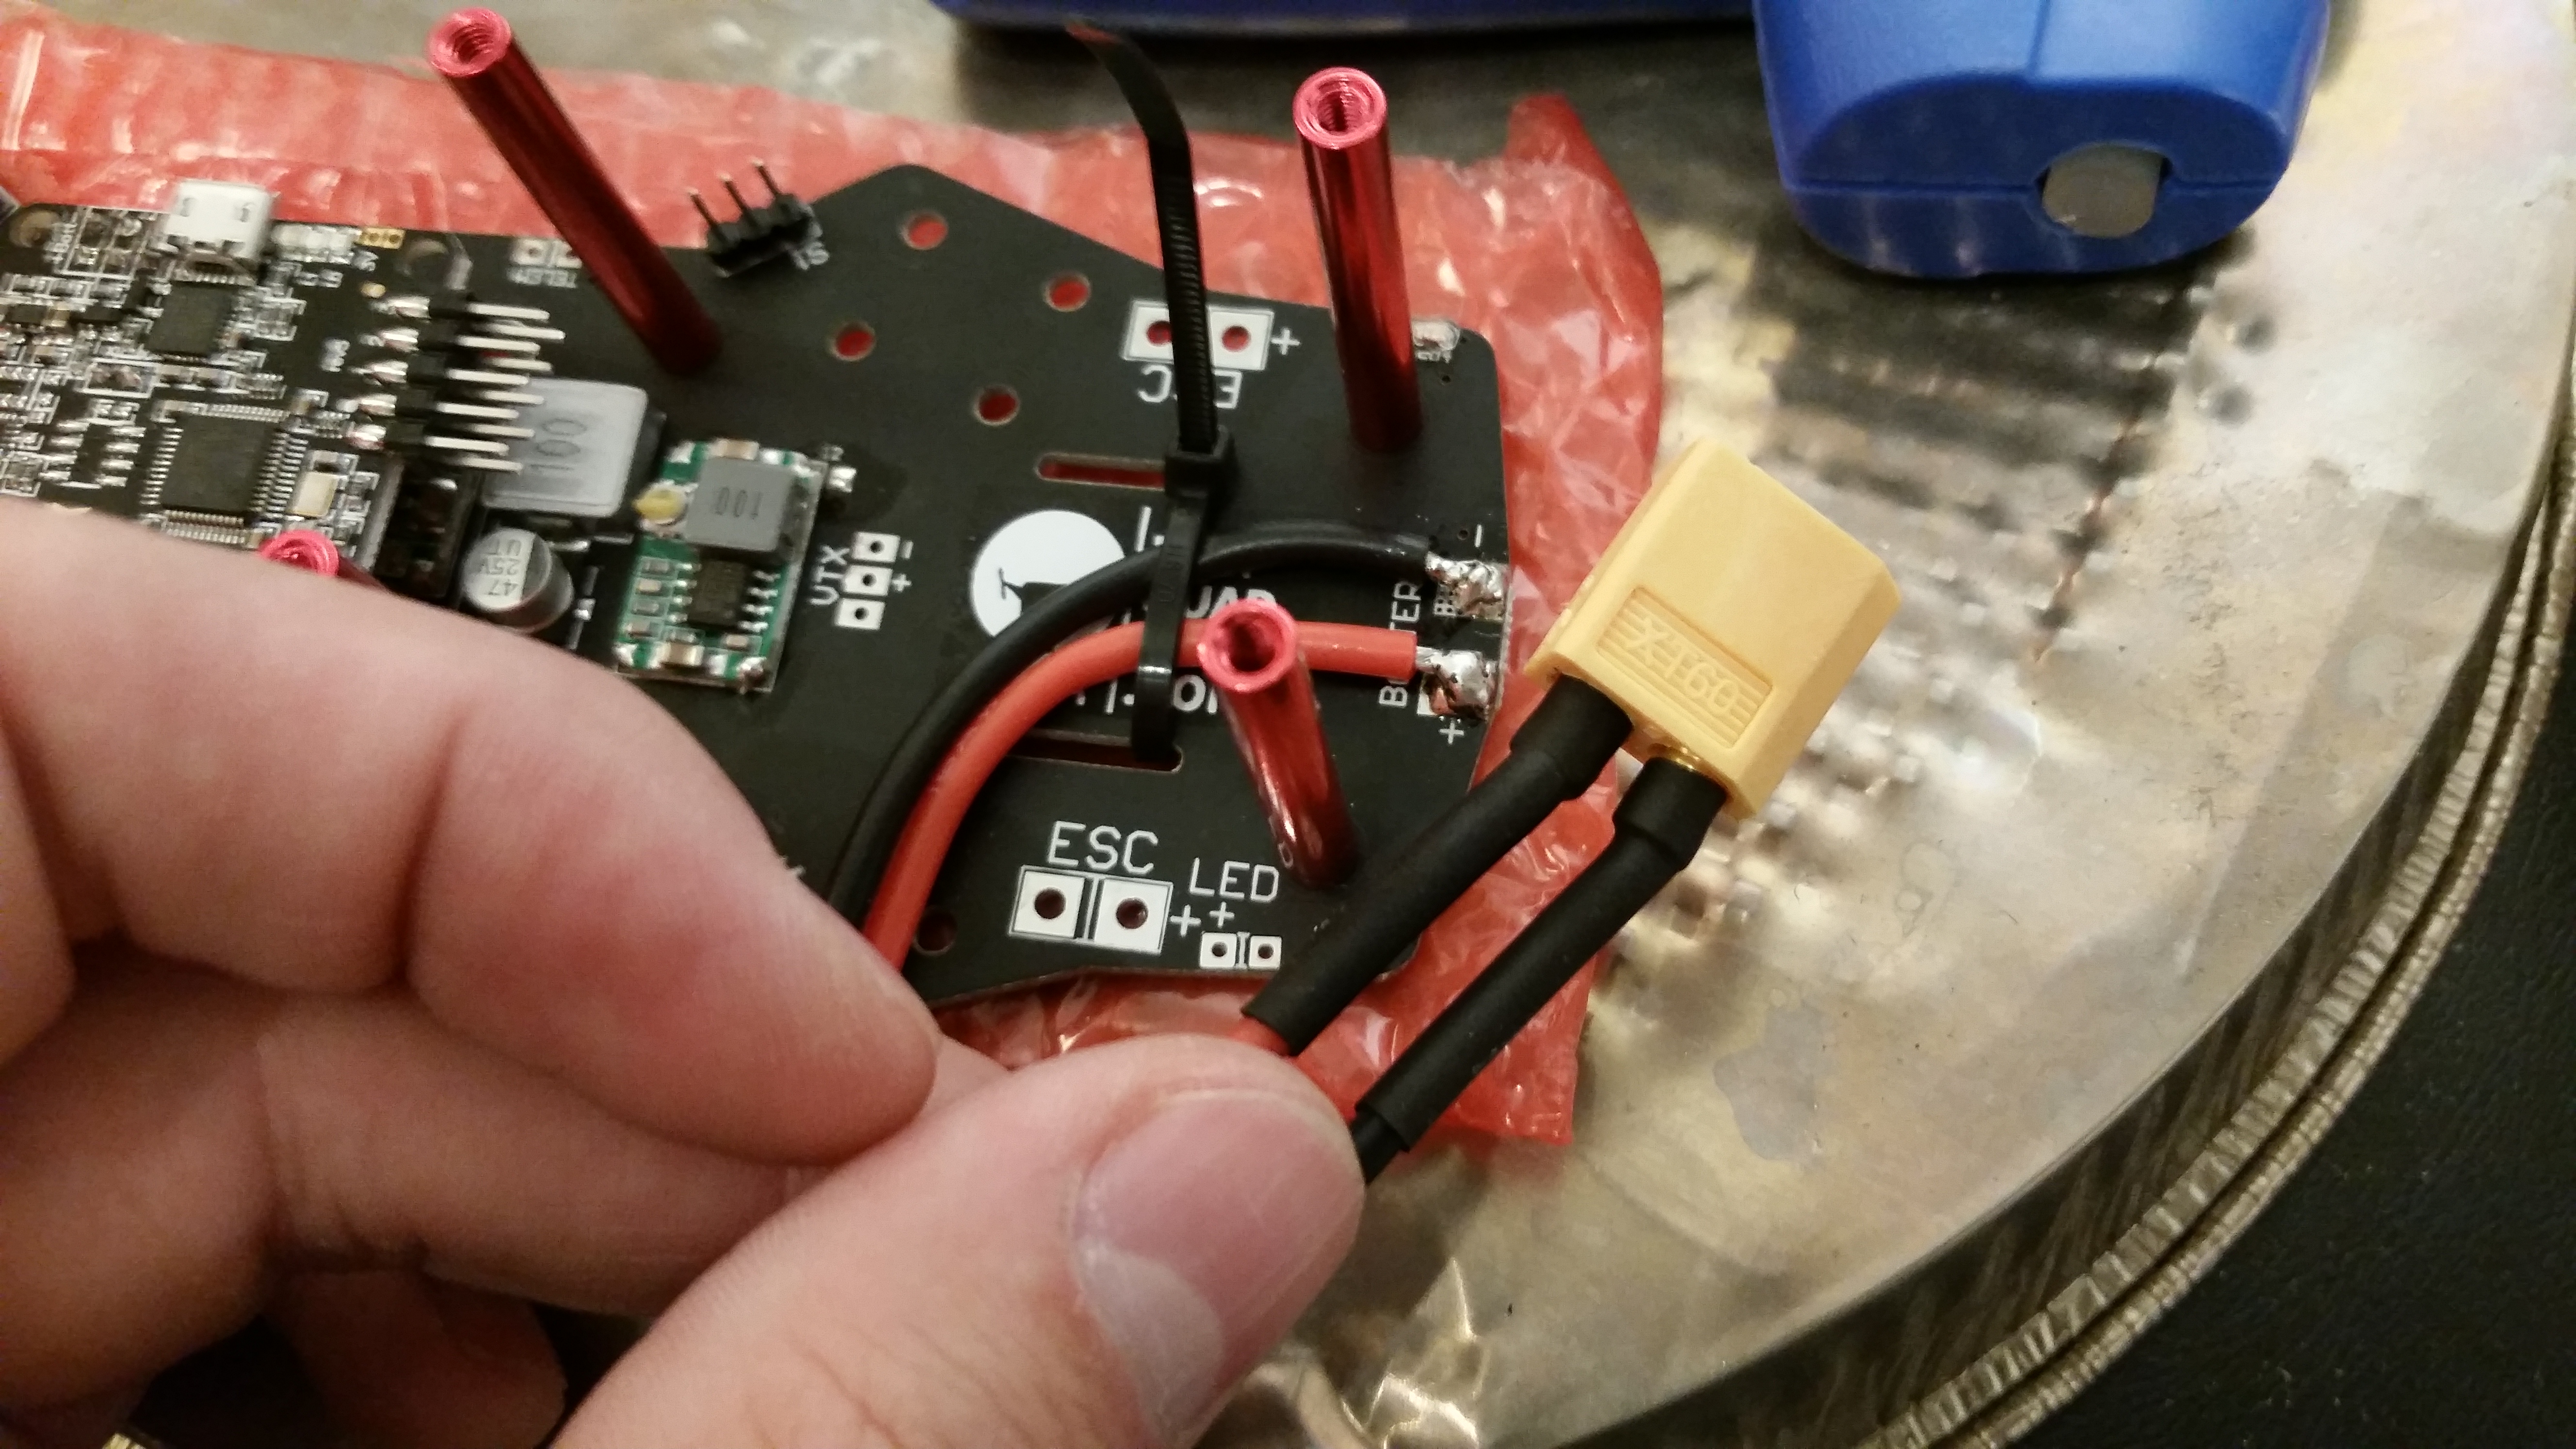
Soldering the battery connector to the Power Distribution Board (PDB)
The first thing I realized is that I’m not very good at soldering. I’ve done it before but never with any finesse. I also have really cheap/poor tools. I burned my fingers several times and had to resolder several bad joints. The pic above is a custom PDB (Power Distribution Board). It replaces one of the carbon-fiber plates and includes pre-soldered sockets that the Naze32 Flight Controller slips right into. It also includes some LEDs, Piezzo Buzzer, voltage regulators and an On Screen Display (OSD).
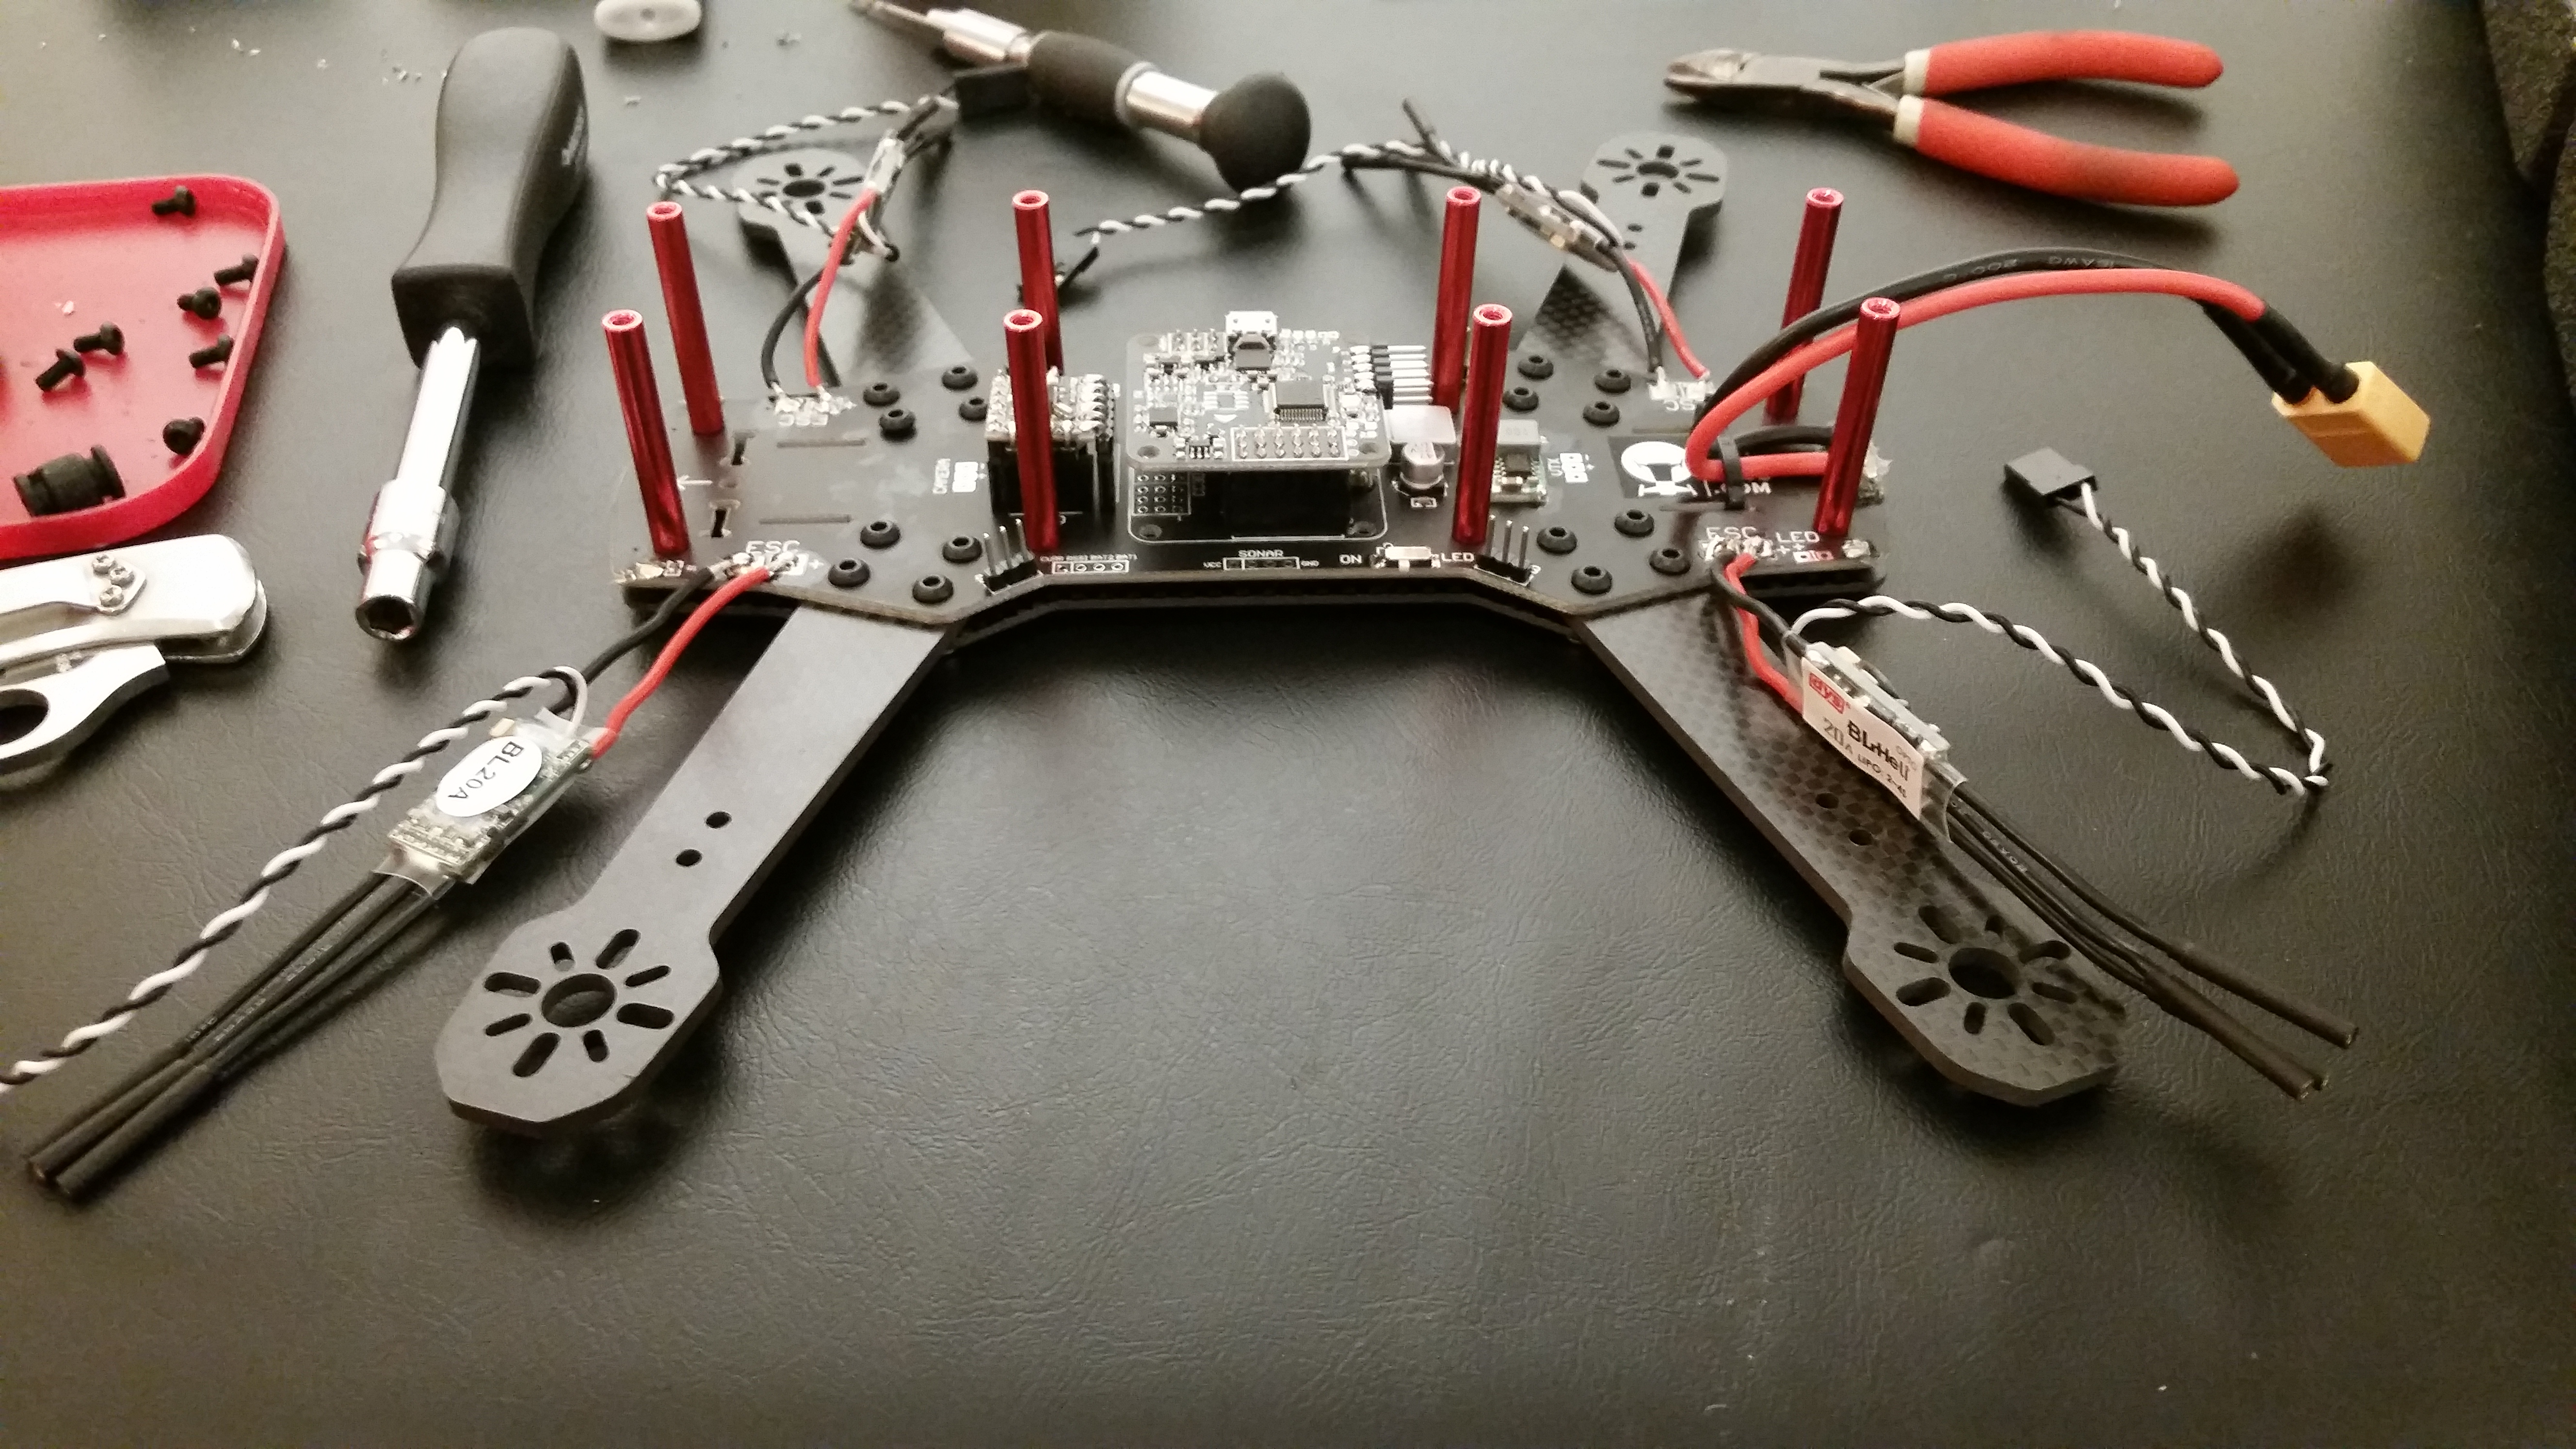
ESCs soldered to PDB
Electronic Speed Controls take a signal from the Flight Controller and voltage from the battery. They use the control signal to manage the amount of power provided to motors. The pic above shows the Naze32 flight controller mounted in the middle of the PDB. The OSD is to the left of the PDB. The ESCs are soldered to the PDB, one for each arm. I coated all of the ESC and battery solder points with hot glue after the solder cooled so they can’t be shorted out by water, debris or stray wires.
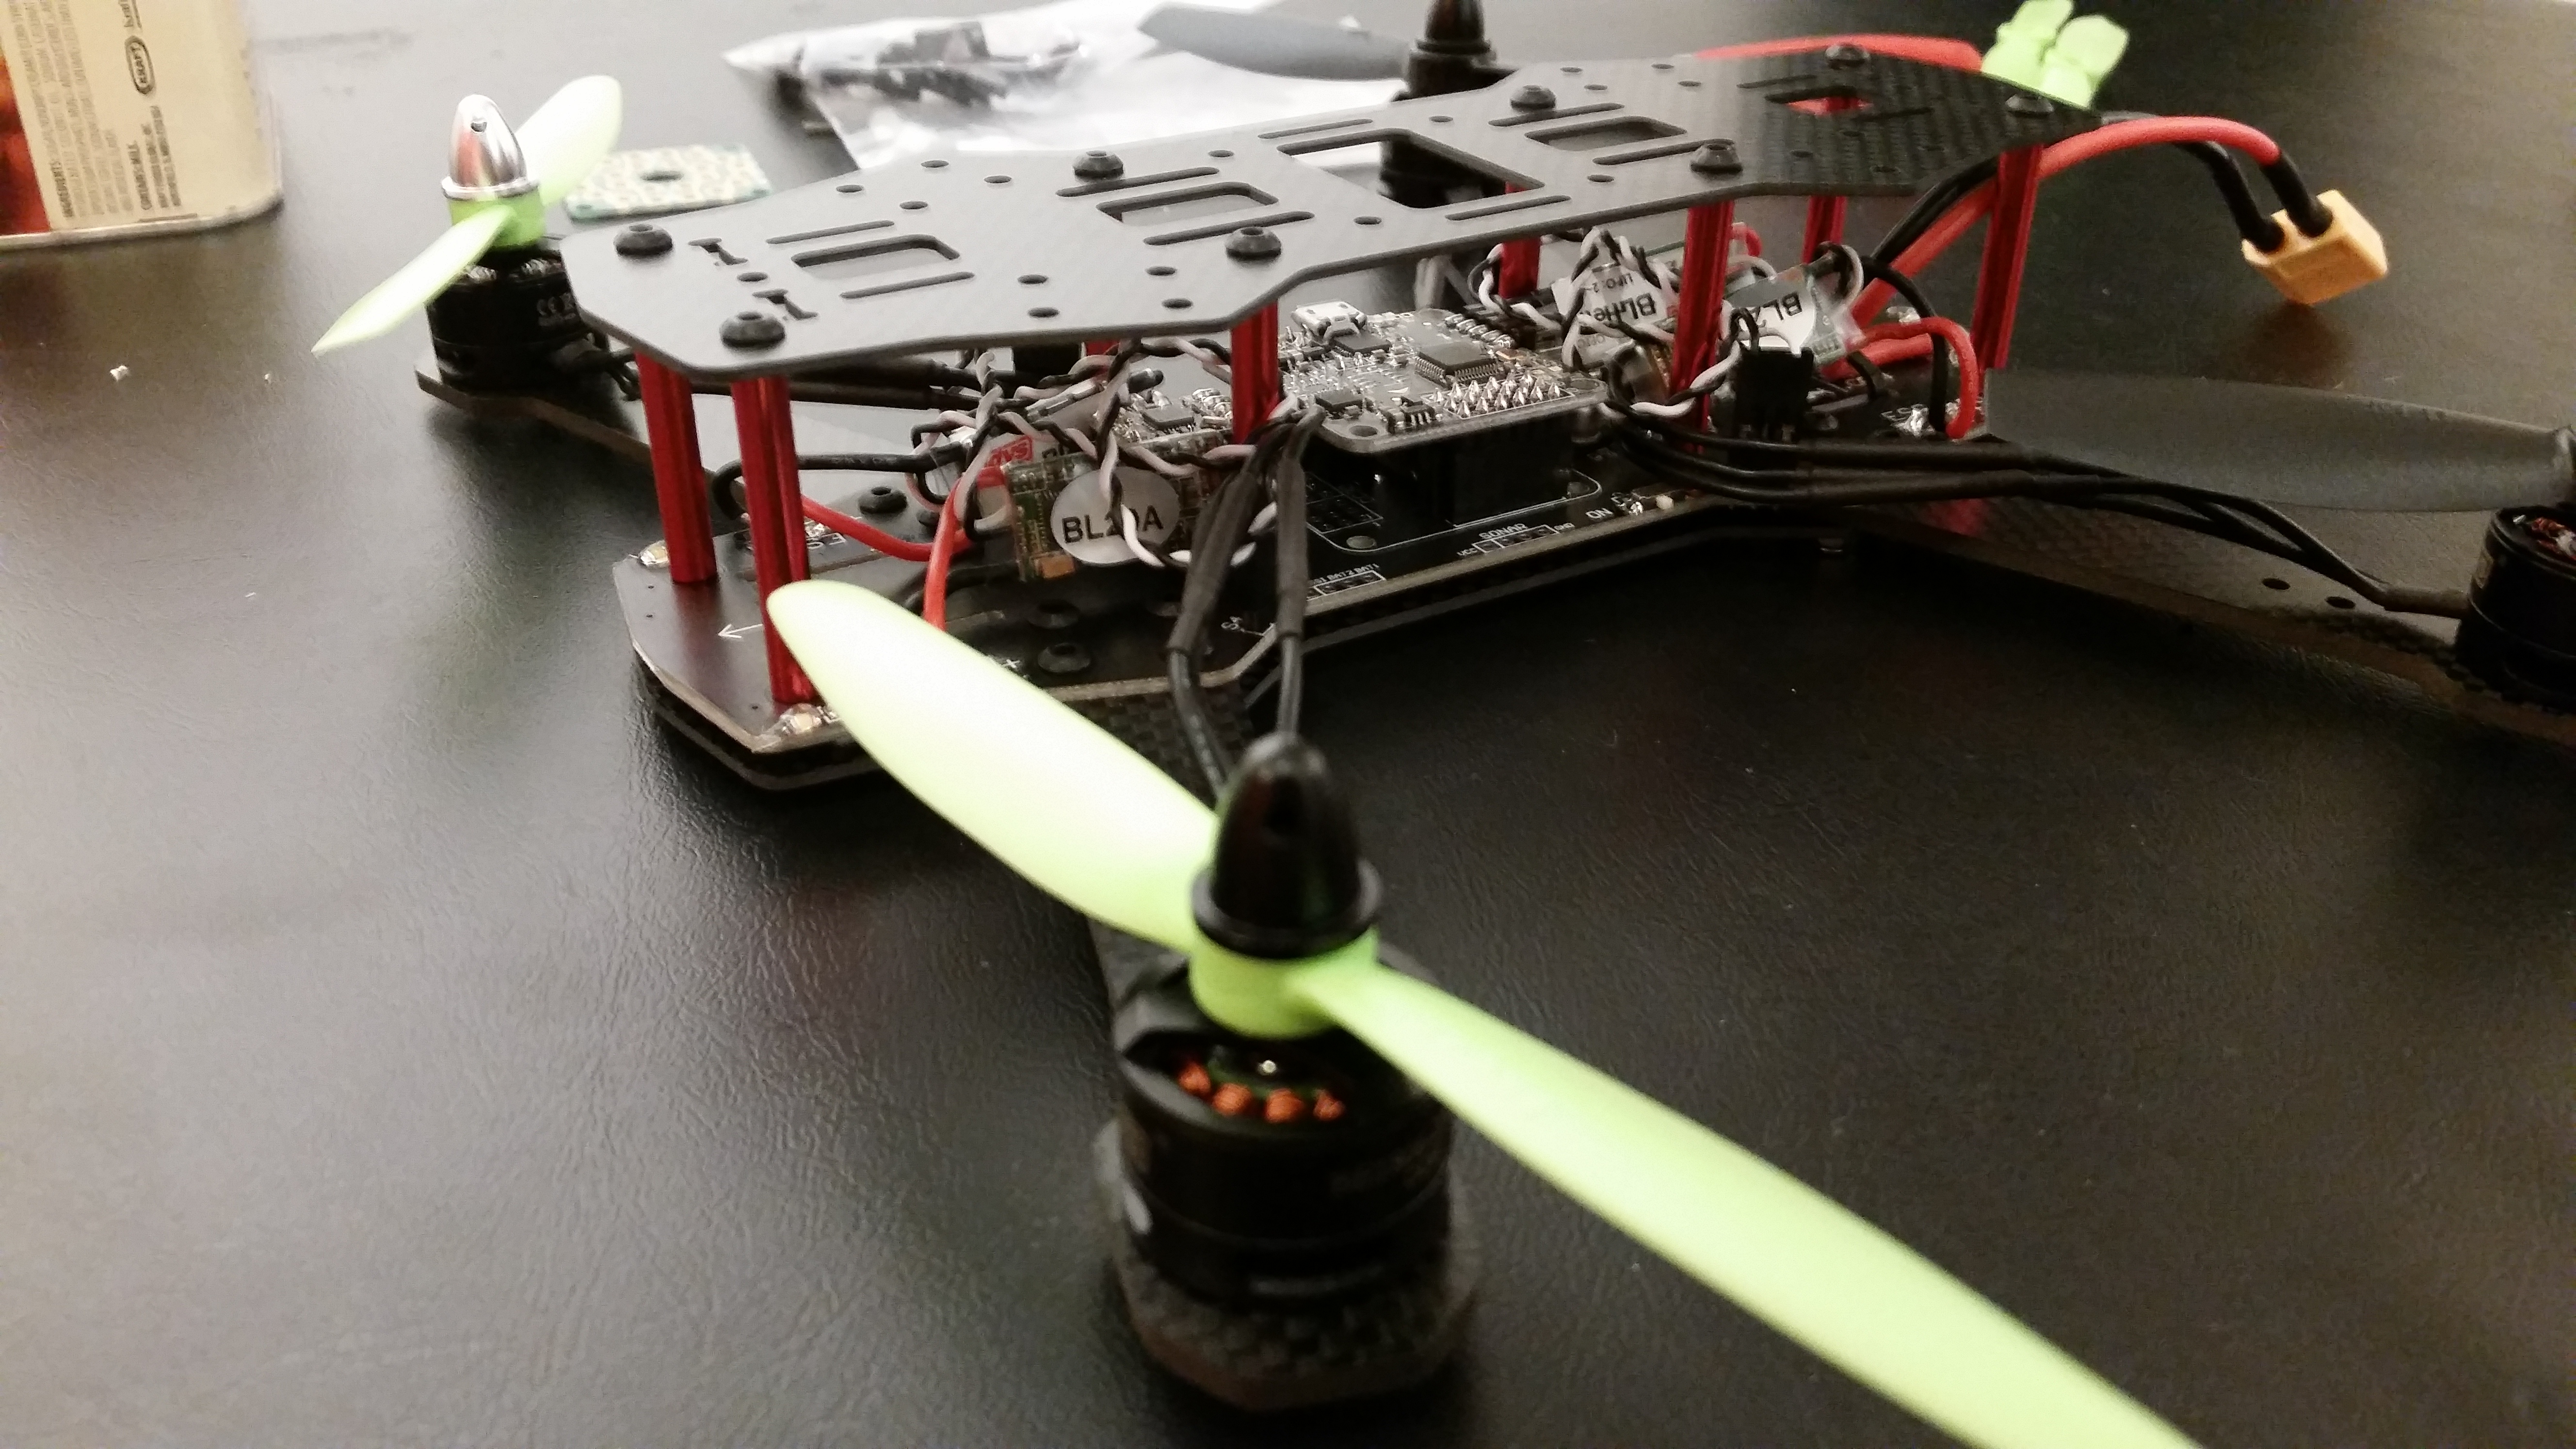
Drone assembled with motors.
Once I got the drone assembled I realized a couple of things. My ESC wires are too long and result in a messy tangle of wires in the chassis. My soldering tools and skills are not quite up to snuff but when I improve I’ll likely snip the motor wires and solder them directly to the ESCs.
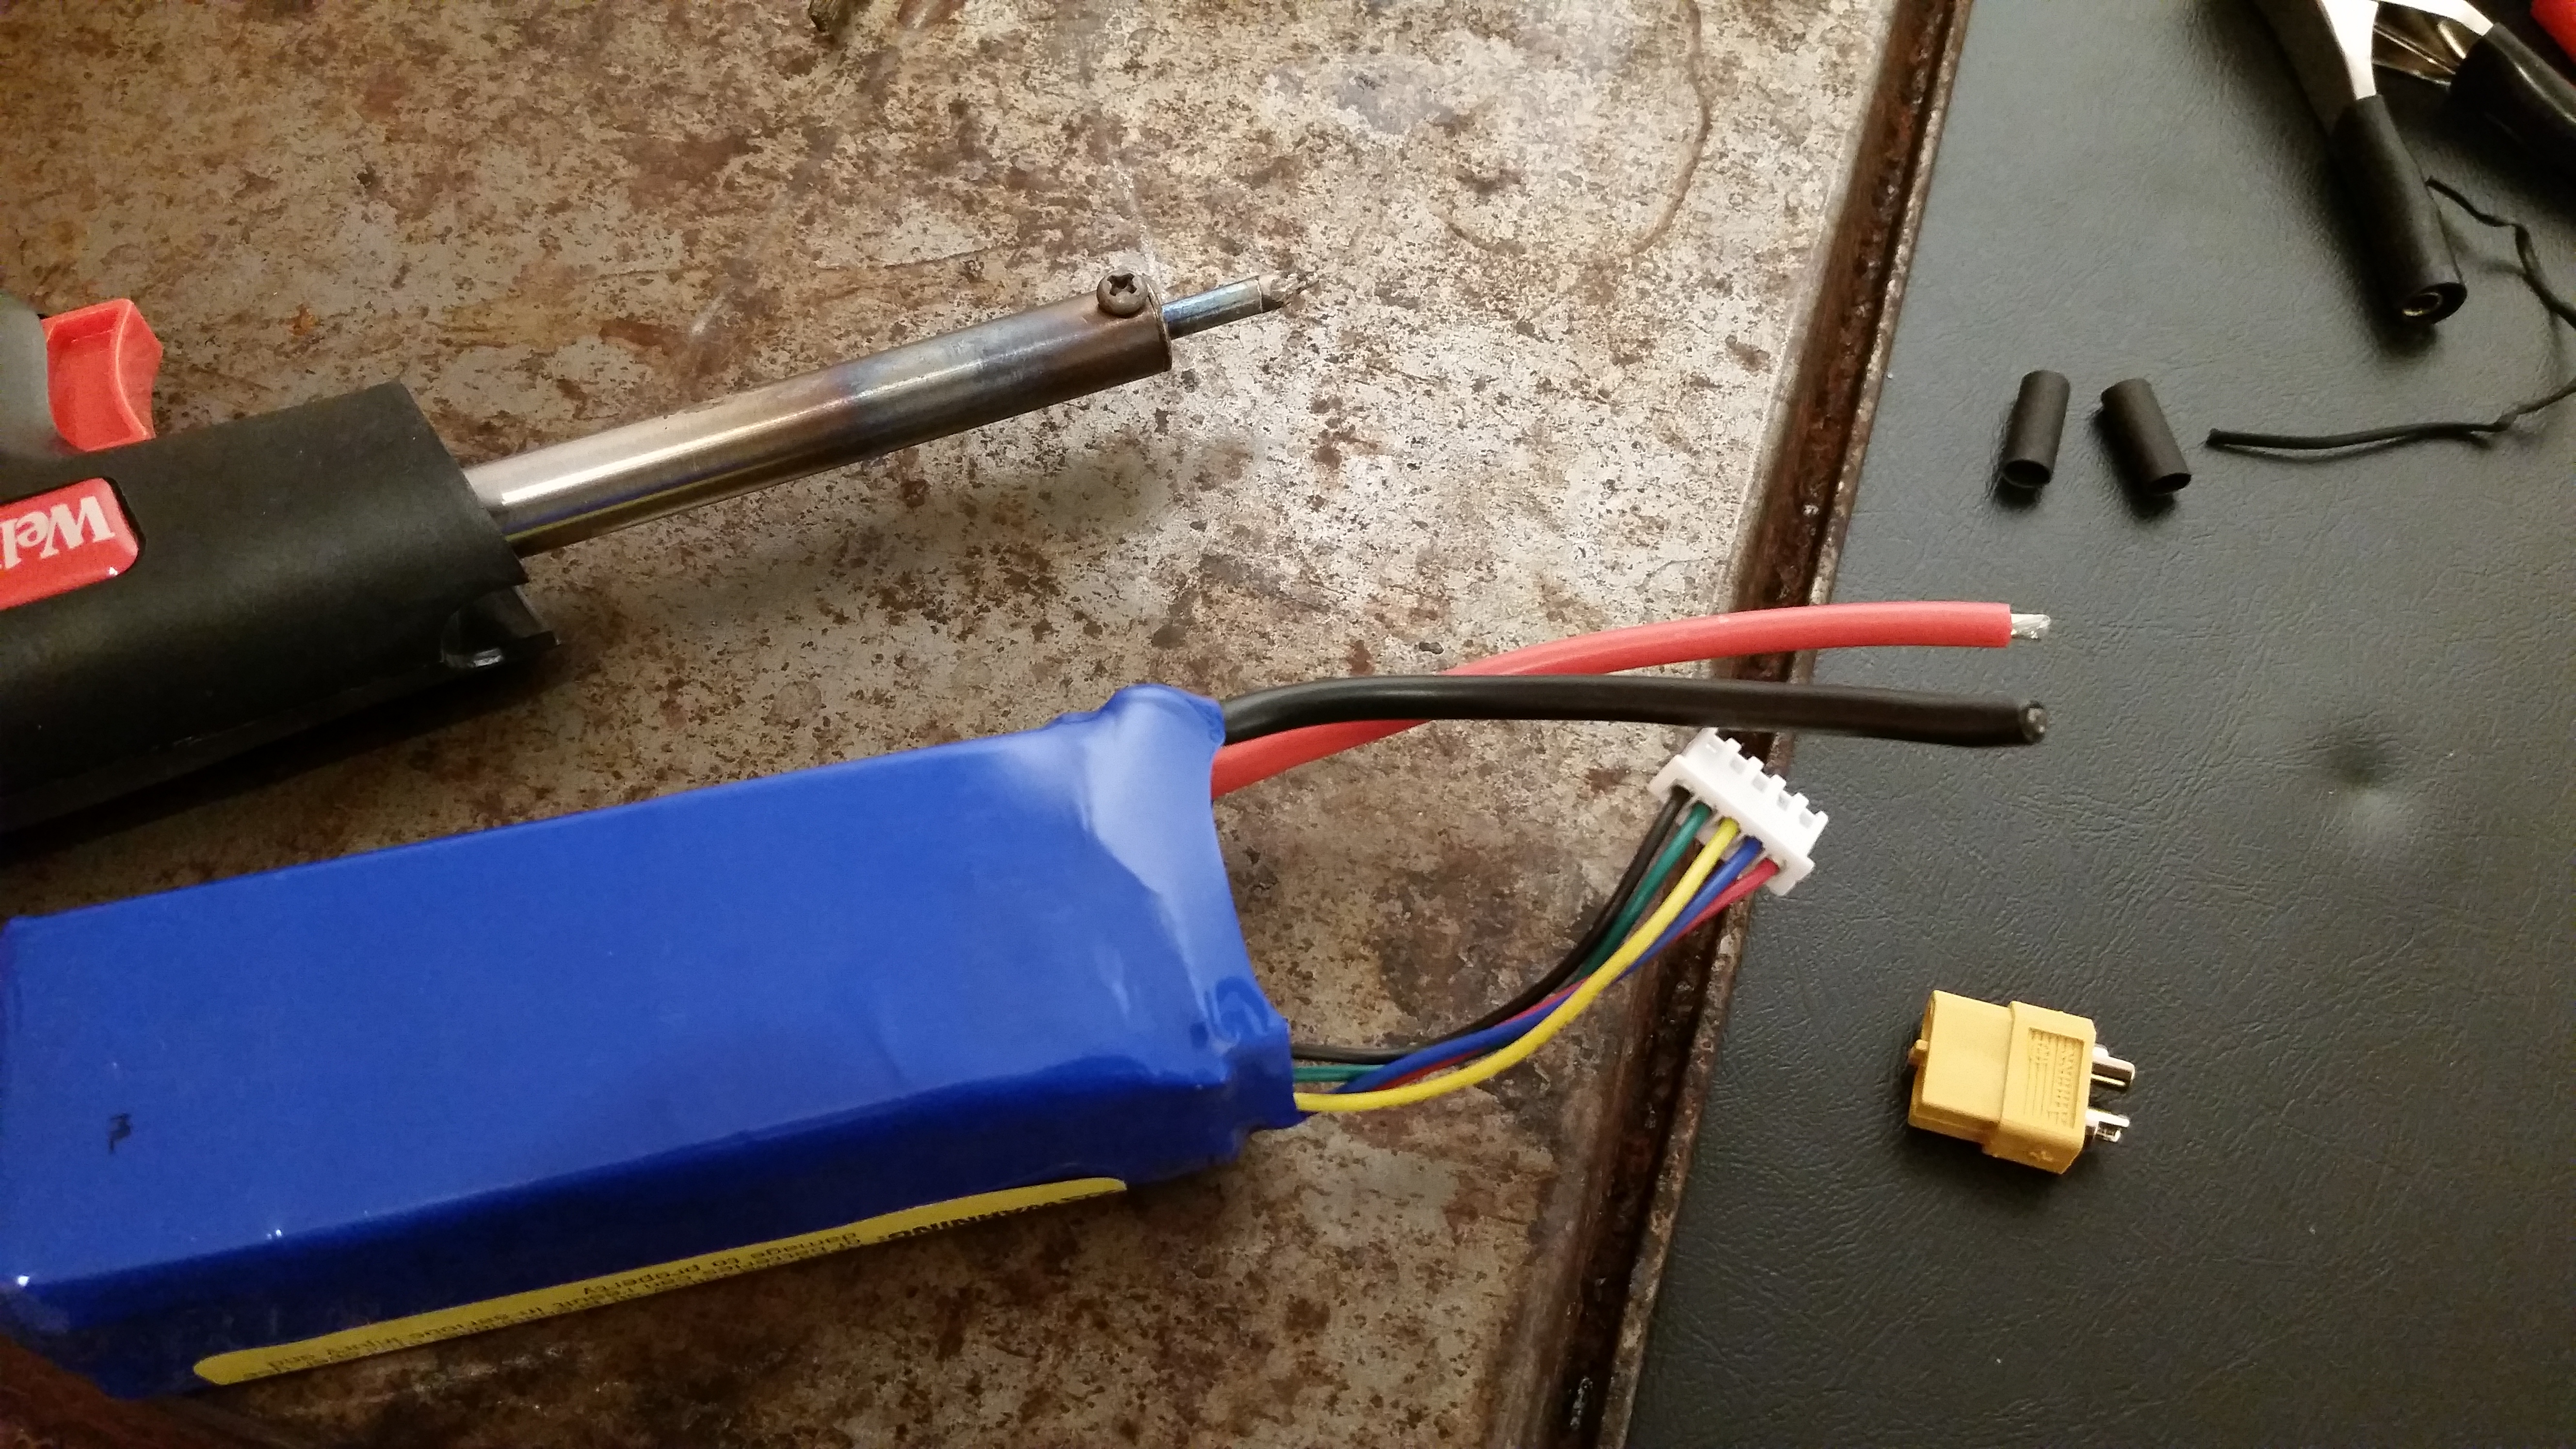
Switching connector type on the battery.
I bought batteries a charger, shrink tubing and extra XT60 connectors from my local hobby shop. They were slightly cheaper (and lower quality) online but I wanted to support local business (they didn’t carry anything else related to custom-quads as they mostly cater to RTR kits).
The batteries came with different adapters so I soldered XT60 connectors on. A couple of tips:
- Watch a tutorial on soldering these if you’re not a pro. You have limited wire on the battery to screw up and there are some tricks to it.
- Cut one wire at a time or you’ll short the battery. Even new batteries have charge. This is scary, bad for the battery and a good way to burn yourself on a soldering iron as you freak out.
- Plug the connector in when you solder it, this sucks some heat into the other connector and prevents melting the plastic. Another suggestion was to use some damp paper towel around the other end of the plug but I didn’t try that.
- Put the shrink tubing on the wire before you solder (duh).
- Use flux. And have better soldering equipment than me. I constantly fought with wire positioning and my crappy, super-cheap gun.
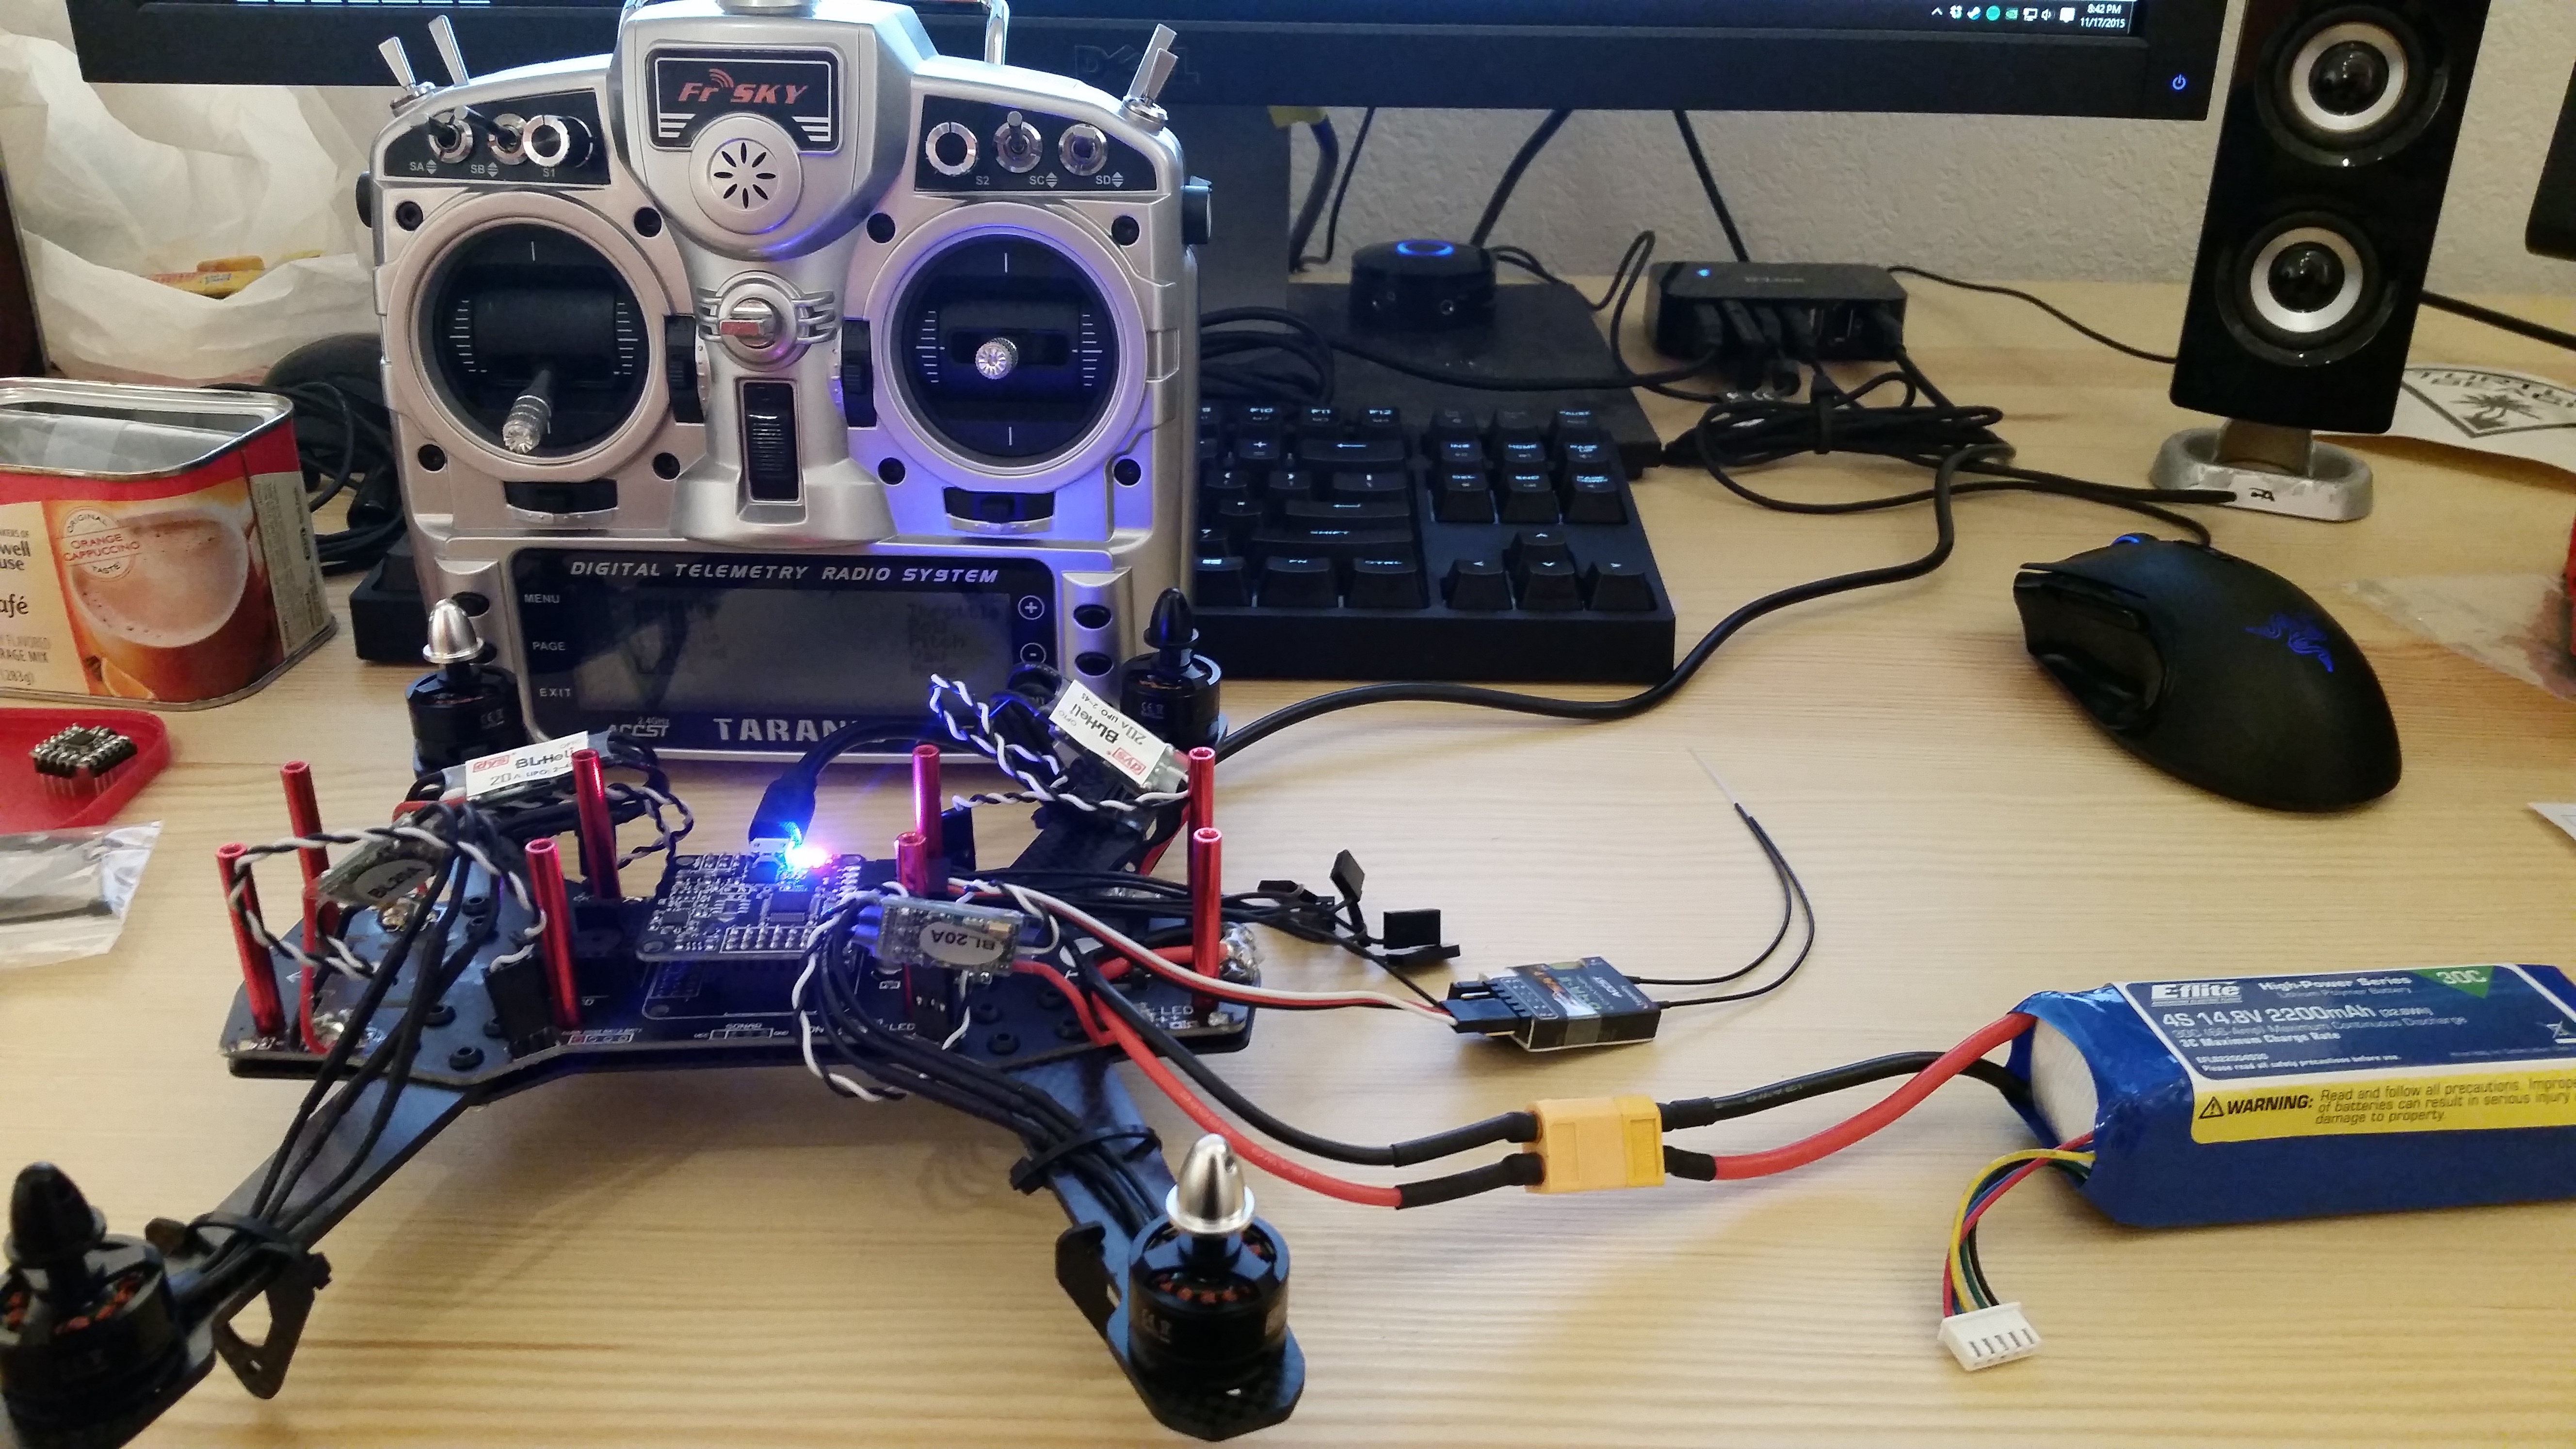
Configuring the Naze32 flight controller.
After getting everything pretty much wired up, I checked the motor rotation. Motors have to spin in a specific direction to balance the torque. Notice that the motors also have different color prop bolts. This indicates their thread direction. They are threaded to self-tighten when spinning. The battery cable in this picture is way too long. I ended up trimming about 1.5″ off and resoldering the XT60.
You can also see the DR4-II receiver (little box with two wires trailing off on right side of quad) I am using. This receiver can handle 4 channels via PWM (Pulse Width Modulation) and 8 channels via PPM (Pulse Position Modulation). PWM uses a different signal pin for every channel and basically turns on the voltage for a period of time (width of the square wave) to transmit a value for the channel. PPM uses one signal pin and sends each channel successively at 50hz. PPM is generally “better” (definitely cleaner wiring!) but not all radios support it.
It’s worth mentioning that you can’t actually broadcast 8 channels with this setup. The pulse width on the Taranis protocol is too narrow and crowds the termination pulse, causing confusion when decoding the transmissions. That’s dangerous! There is a fix for this but it requires flashing your receiver and transmitter so I’m just sticking with 6 or fewer bound channels for now.
Speaking of Radios, I went with a FrSky Taranis X9D radio, which I got from GetFPV. It came with a receiver that doesn’t play well with the Naze so I also got the D4R-II receiver. I’ll keep the other receiver to use in another project.
The X9D has a crazy amount of customization options in both hardware and software. It’s got switches everywhere and can store loads of models (not sure how many). I believe it can handle 16 channels but I still have a lot to learn about this. I chose this radio because it seems really popular for FPV racing, it’s open source and super “hackable”, and can plug right in to PC/Mac with USB. More on that later.
Finally, Acro Naze32 Flight Controller (FC) configuration. I downloaded the driver that allows the USB to send serial signal. Then I got the BaseFlight chrome extension. A lot of Naze are being flashed with Cleanflight now but the tutorials and stuff I have been looking at were all BaseFlight.
Configuration was a little wonky. The first flash claimed success but the Naze just beeped repeatedly (defeaningly loud). I removed the OSD chip because I don’t have an FPV kit yet. Some of the beeping went away. I think it may have been providing power to the buzzer and beeping constant battery voltage warnings (battery wasn’t plugged in)? Additionally the output console had all kinds of ASCII errors – screwed up text encoding. I suspect the config starter I downloaded from MiniQuadBros had the wrong character encoding. I wiped the FC, saved the downloaded config.txt as UTF-8 using Sublime Text, reflashed and imported the config in the CLI. This time everything worked fine.
Taranis radios broadcast channels in an unusual order. It took me awhile to figure out why all of my channels were mapped incorrectly. Once I got that sorted out and read a couple of tutorials, I had all of the control channels bound up. I also bound a three-position switch to move between Angle, Horizon and Acro modes.
After a couple of hours mucking around and working through various issues, I was confident I had configuration at a good basic starting point. I basically approached it like any software problem: removing variables and solving each issue in isolation as much as possible.
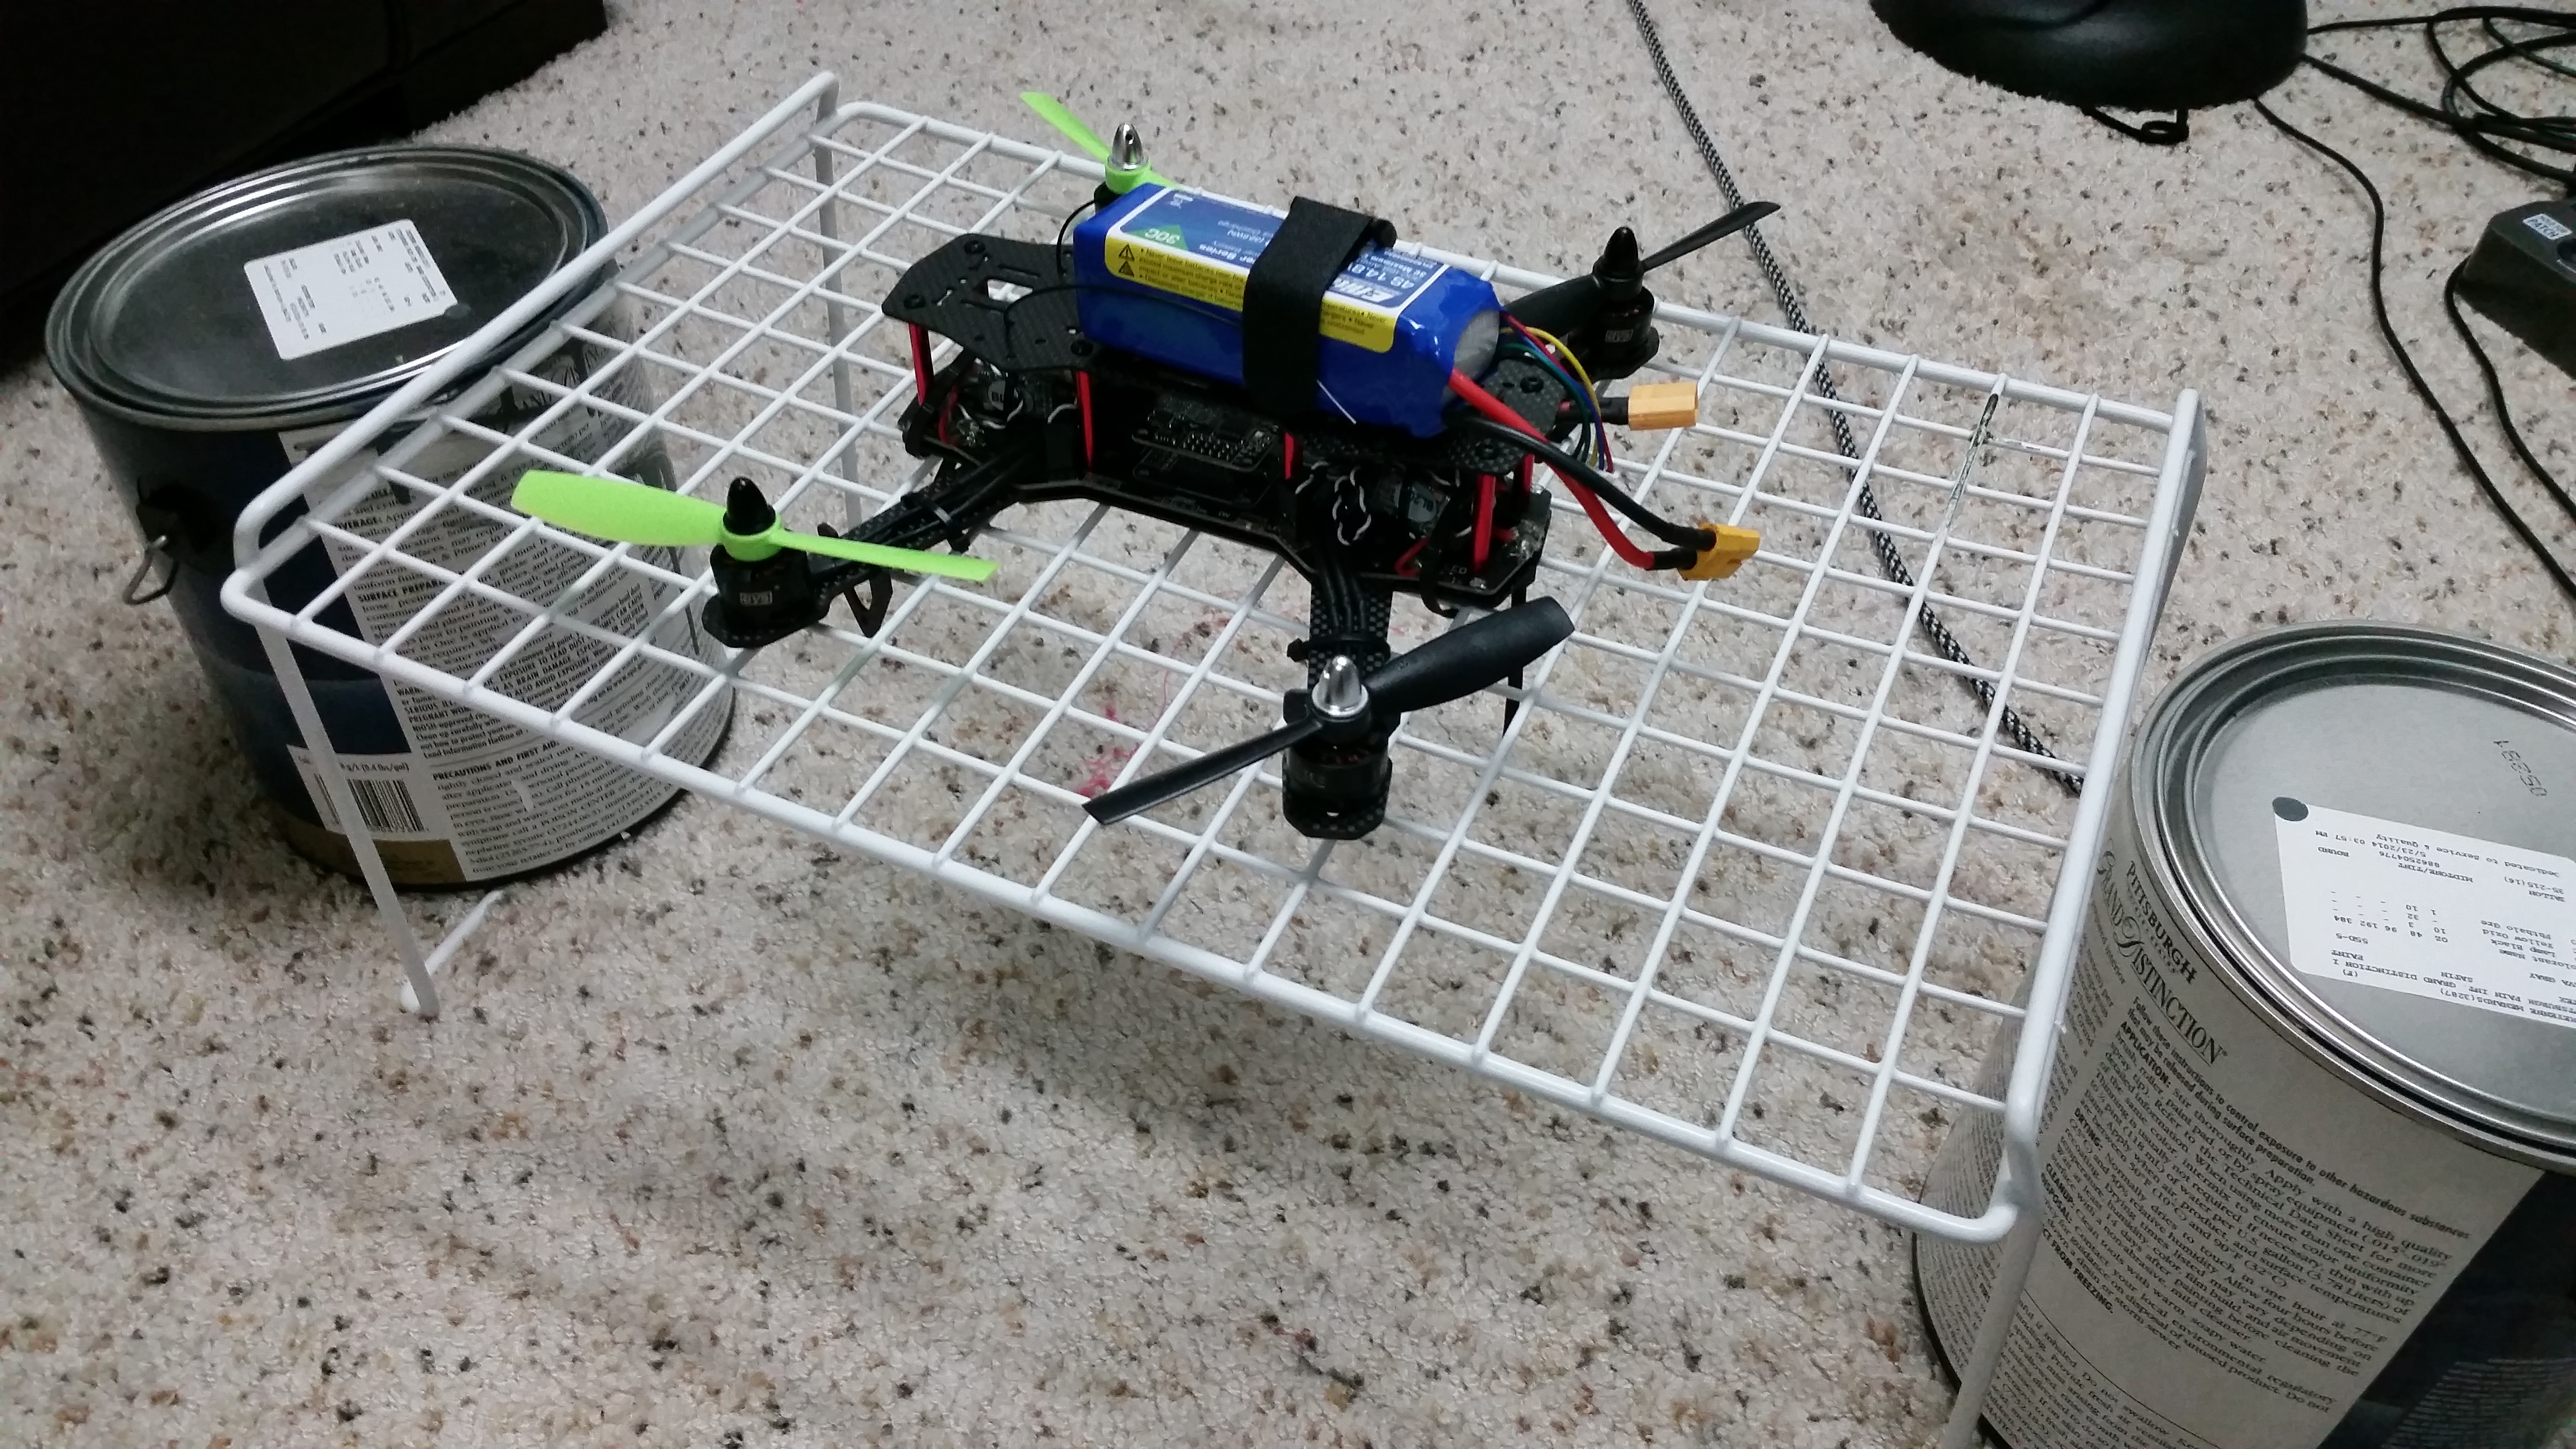
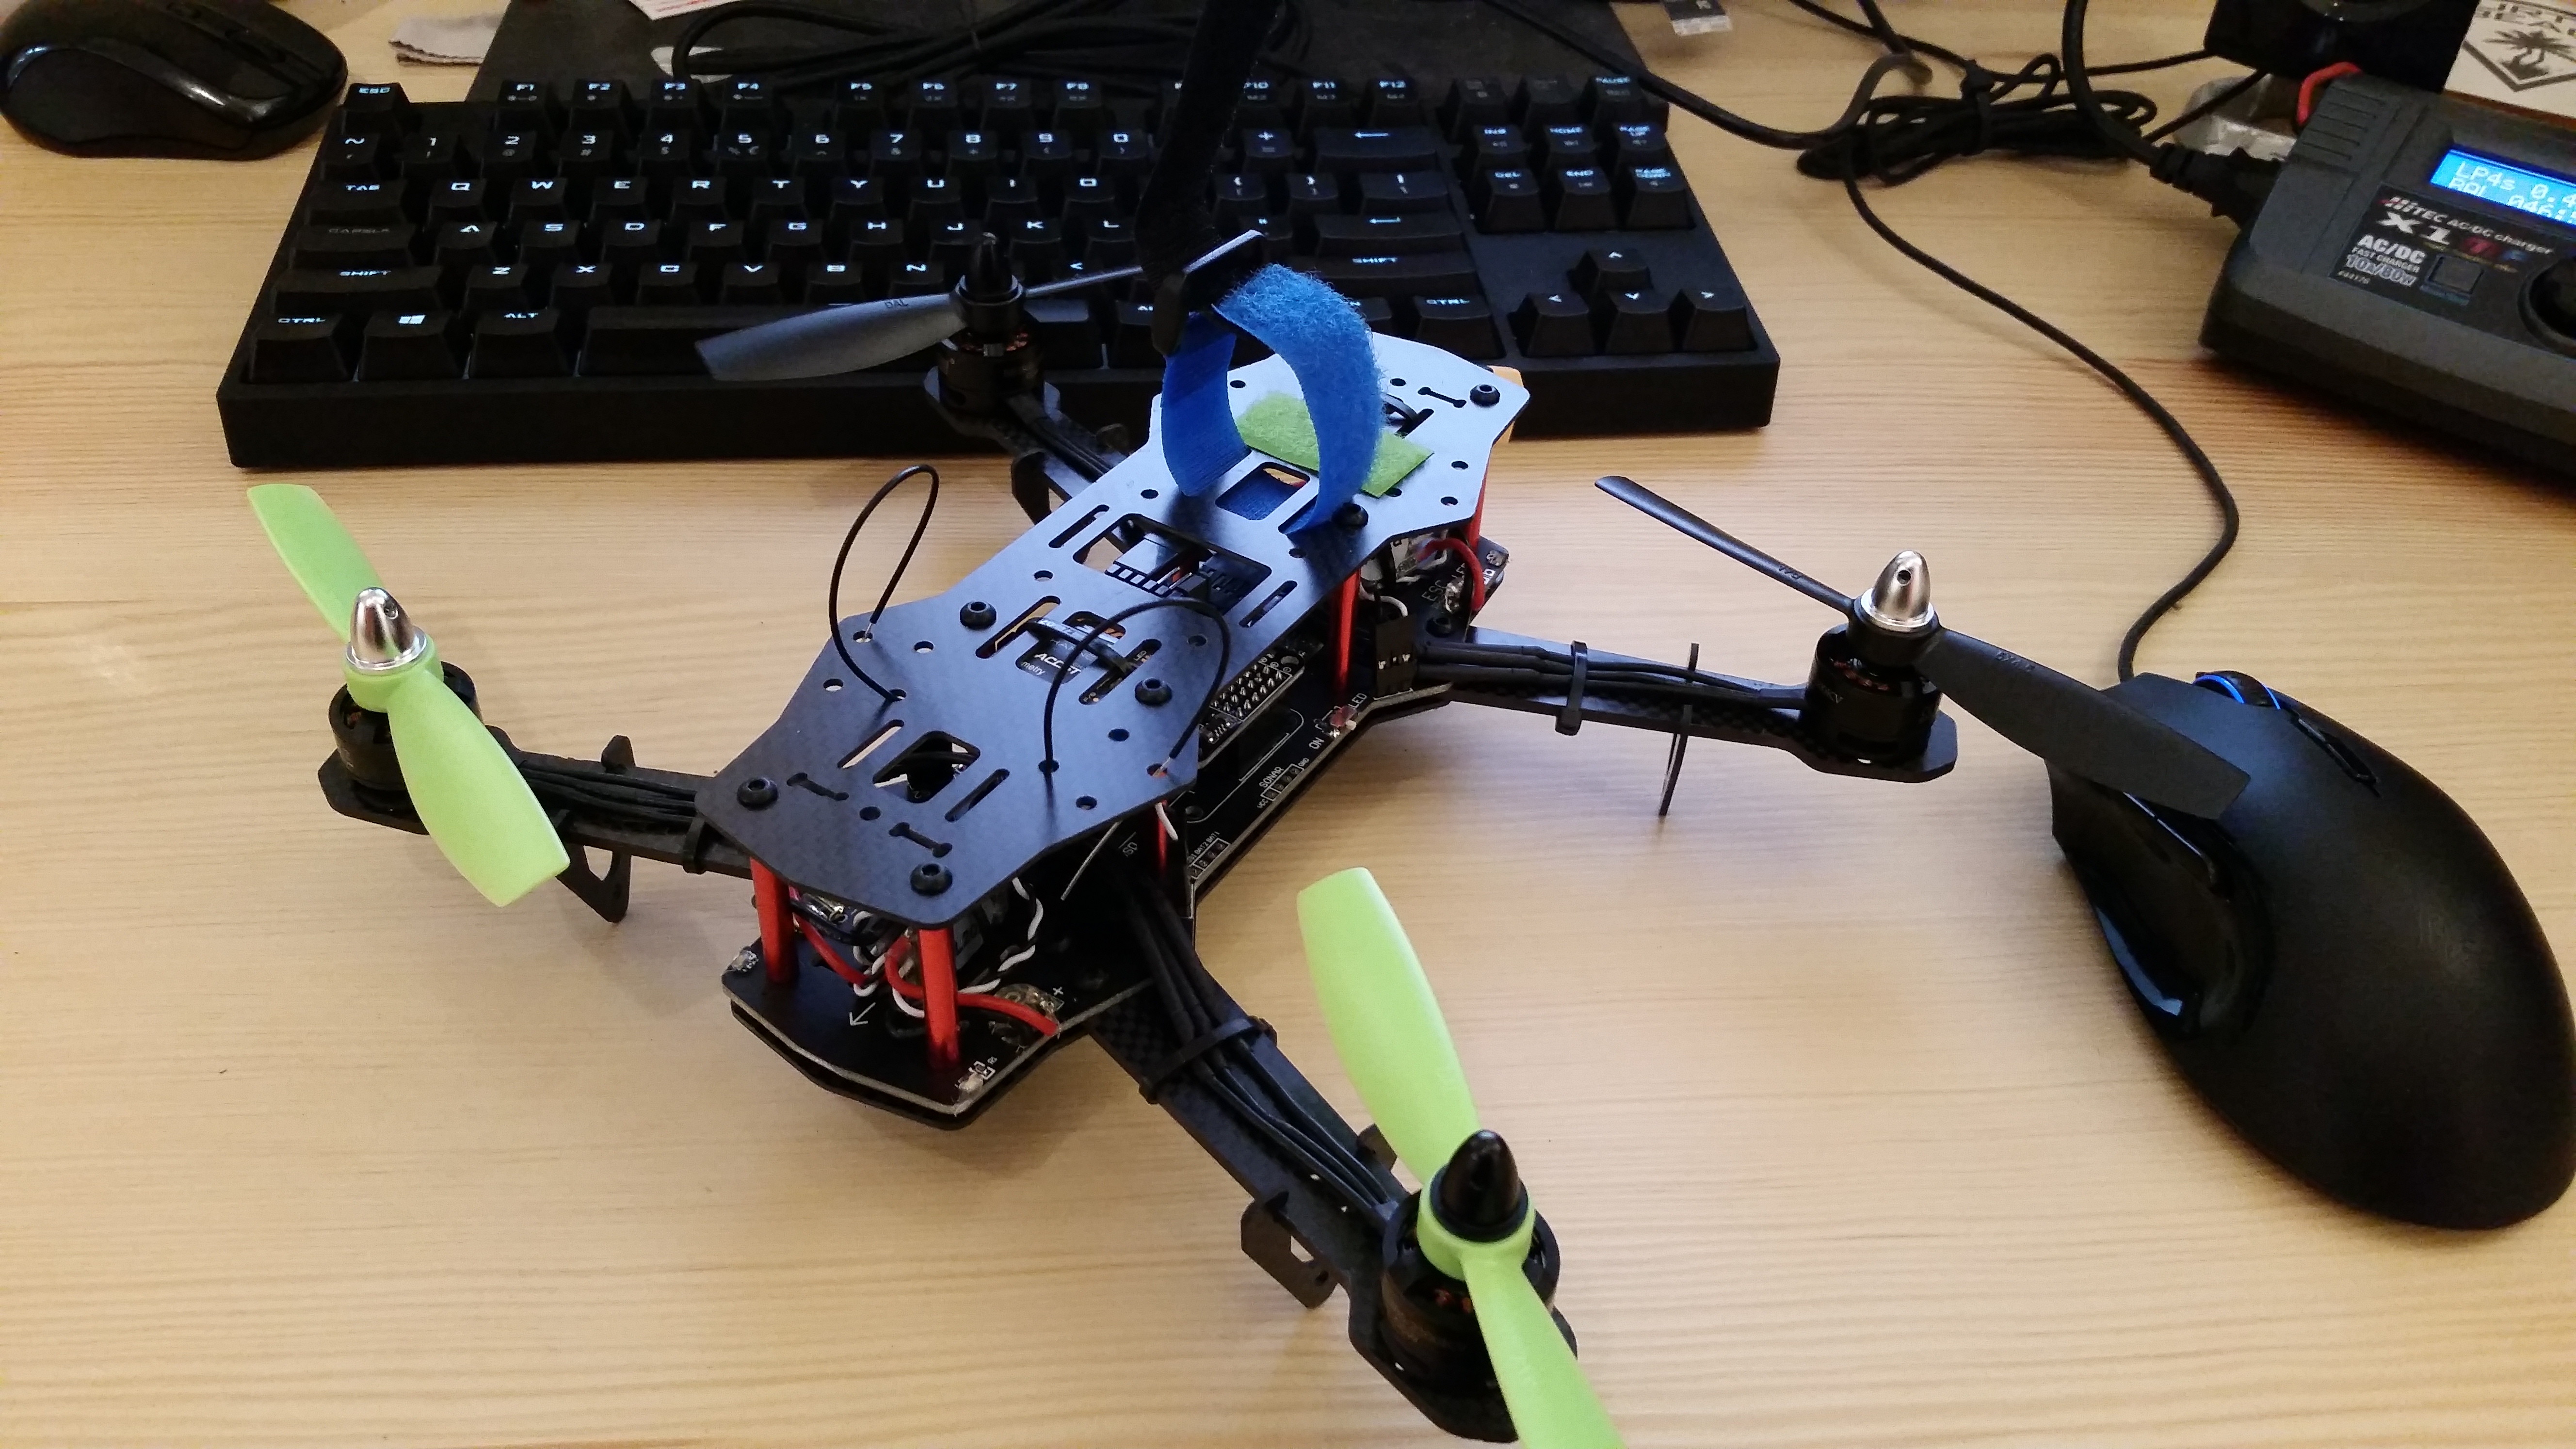
Tied down for testing.
Drones are not toys, they can be dangerous! My business partner cut his fingers deeply on the rotors of our DJI. The weather outside has been getting nasty and I planned to maiden the quad indoors. I wanted to eliminate as much uncertainty as possible for the sake of safety. After getting everything assembled and configured I zip-tied it securely to a mesh rack and weighed it down with cans of paint. I armed and spun up the rotors, checking to make sure each one was pushing air the correct way and that it responded immediately when I killed the throttle.

Maiden flight!
Redbrace Inc’s first drone made her maiden flight in our office kitchen during a snowstorm on November 18th, 2015. It was uneventful in all the right ways. I throttled up very slowly while all of us were ready to duck and cover if something went wrong! I scooted around on the smooth floor for a bit to make sure directions were working and then brought it up to a low hover a few times.
Some things I learned in the first few hover-only flights:
- The craft was vibrating a lot when applying throttle. I thought this was a motor or balance problem but I believe it’s actually the FC auto-correcting levels too quickly and causing occilations. This can be addressed by addressing the PIDs, likely lowing the P value for the roll.
- I added a little expo and tuned the throttle max to 75% on the radio for now. This makes low-hovering a lot easier by increasing the amount you move the stick at low throttle rates. This way I’m not always bouncing it off the ground and have more control at low altitude.
- The battery cable was too long. At one point the rotors brushed the cable and nicked the positive cable. I rerouted wiring with some zip ties and electrical tape to prevent this.
- The battery shifts during flight, a single velcro tab won’t hold it securely. I added a piece of velcro to the body with hot glue and a piece to the battery. Now the velcro strap holes it down and the velcro contact keeps it from shifting.
- Accelerometer calibration on a level surface is important. My desk apparently isn’t super level and the “level” state had quite a bit of movement. Addressing this with trim settings is a poor solution. I’ll be recalibrating regularly on a level surface.
As a final note, you can plug the X9D into your PC or Mac and set it up as a joystick fairly easily. There’s a program called FPVFreerider that is super cheap ($5 minimum but I suggest offering a little more, I did!) and is an excellent place to start. I have been practicing a lot and we had a lot of fun trying to beat each others’ lap time during one of our office happy hours:
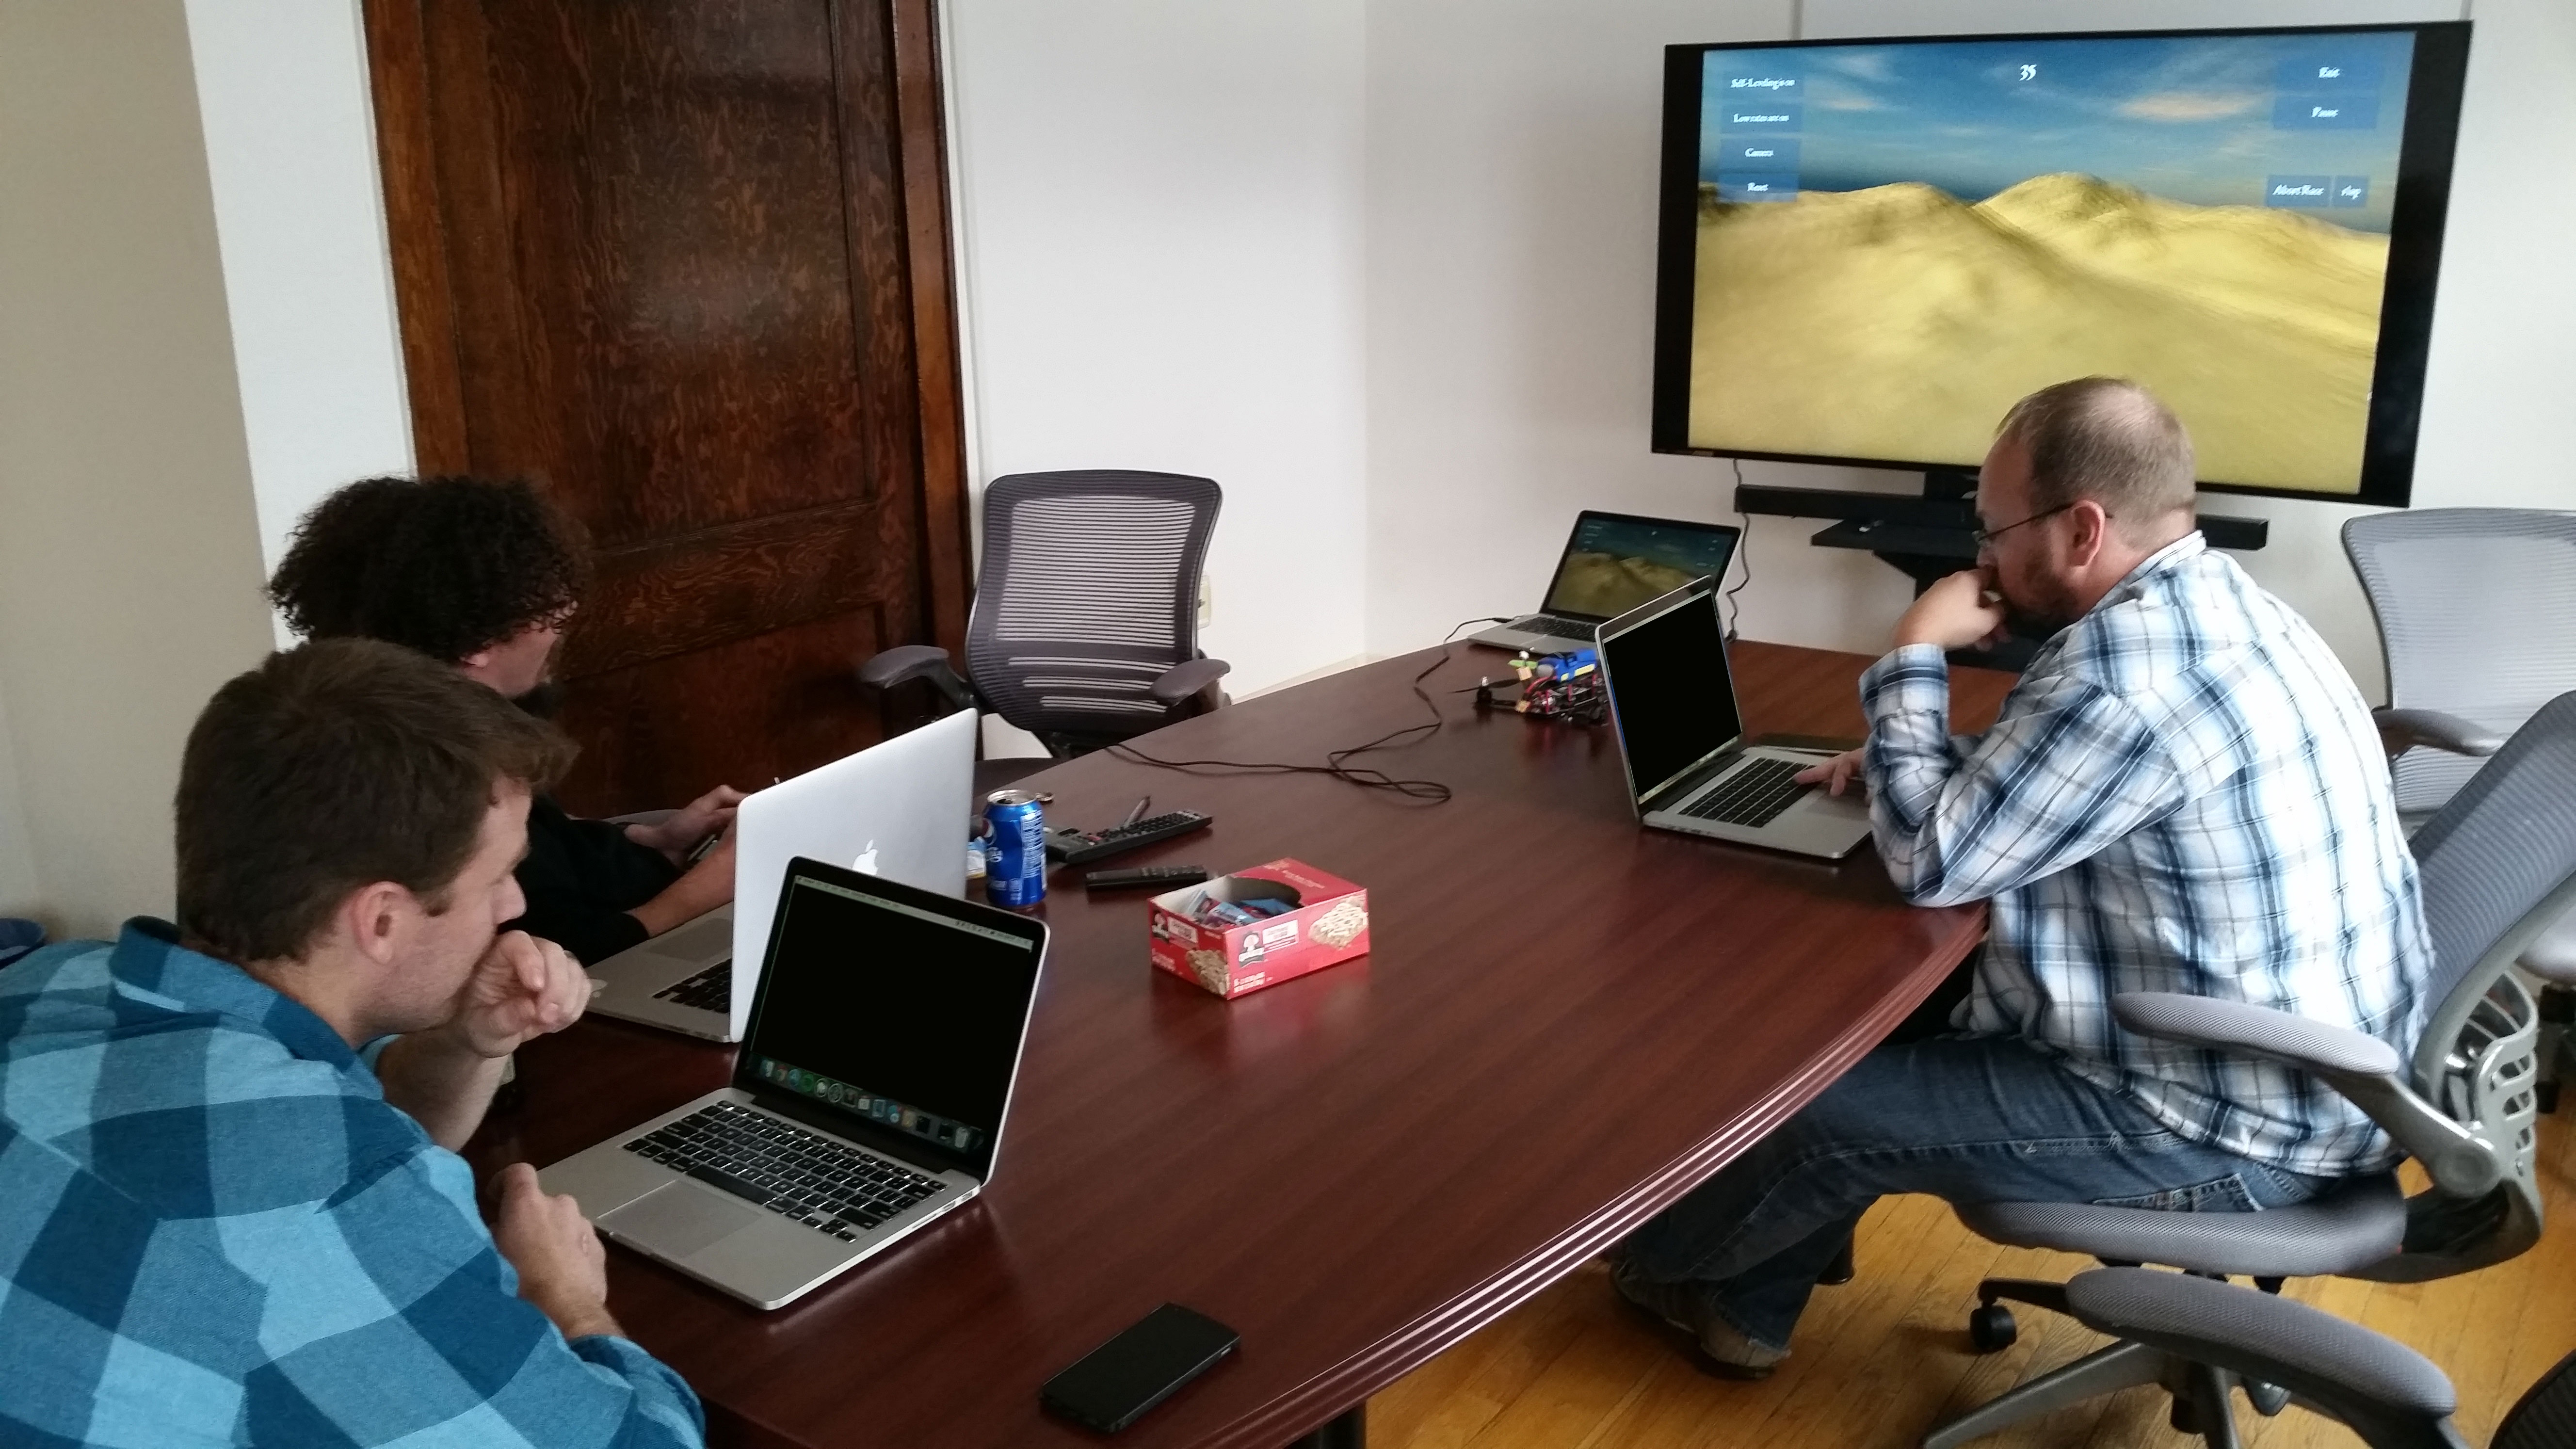
Happy hour racing in FPV Freerider
I’m new and there are far better sources of info out there but feel free to post questions or comments. I can also post a parts list at some point.